What is the Best Paint for Aluminum Siding?
What is the best paint for aluminum siding? That’s a great question, and one many homeowners grapple with. Choosing the right paint isn’t just about aesthetics; it’s about protecting your investment and ensuring your siding looks great for years to come. This guide will walk you through the different paint types, surface preparation techniques, application methods, and maintenance tips to help you achieve a professional-looking, long-lasting finish.
We’ll explore various paint options, from durable acrylics to flexible latex paints, examining their pros and cons in detail. Proper preparation is key, so we’ll cover cleaning, repairing, and prepping your aluminum siding for optimal paint adhesion. Finally, we’ll delve into application techniques and maintenance strategies to keep your siding looking its best, all while considering environmentally friendly choices.
Types of Paint for Aluminum Siding
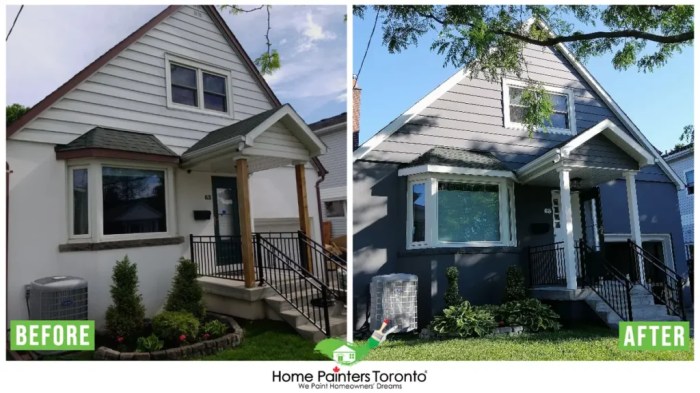
Source: homepainterstoronto.com
Choosing the right paint for your aluminum siding is crucial for a long-lasting, attractive finish. Different paint types offer varying levels of durability, flexibility, and weather resistance, so understanding these differences is key to a successful paint job. This section will explore the most suitable paint types for this specific application.
Acrylic Latex Paint
Acrylic latex paints are a popular choice for exterior projects, including aluminum siding. They offer a good balance of durability, flexibility, and ease of application. The latex base makes them relatively easy to clean up with soap and water. These paints are known for their excellent weather resistance, meaning they can withstand rain, sun, and temperature fluctuations without significant degradation. Application is straightforward using brushes, rollers, or sprayers, though sprayers often provide the most even coat, especially on large areas.
100% Acrylic Paint
While similar to acrylic latex, 100% acrylic paints generally offer superior durability and weather resistance. They tend to be more resistant to fading and chipping, making them a longer-lasting option. However, they can be slightly more expensive than acrylic latex paints. Application methods are similar, with brushes, rollers, and sprayers all being viable options. The thicker consistency might require a slightly slower application process with brushes or rollers.
Epoxy Paint
Epoxy paints are known for their exceptional hardness and durability. They form a very tough, protective coating that is highly resistant to chipping, scratching, and fading. This makes them a good choice for areas that experience a lot of wear and tear. However, epoxy paints can be more challenging to apply, often requiring specialized equipment and techniques. They also typically have a shorter working time, meaning you need to work quickly once mixed. Sprayers are usually preferred for even application, though brush application is possible with careful technique.
Comparison of Paint Types
| Paint Type | Durability | Flexibility | Weather Resistance | Application |
|---|---|---|---|---|
| Acrylic Latex | Good | Good | Good | Brush, Roller, Sprayer |
| 100% Acrylic | Excellent | Good | Excellent | Brush, Roller, Sprayer |
| Epoxy | Excellent | Fair | Excellent | Sprayer (Preferred) |
Surface Preparation for Painting Aluminum Siding

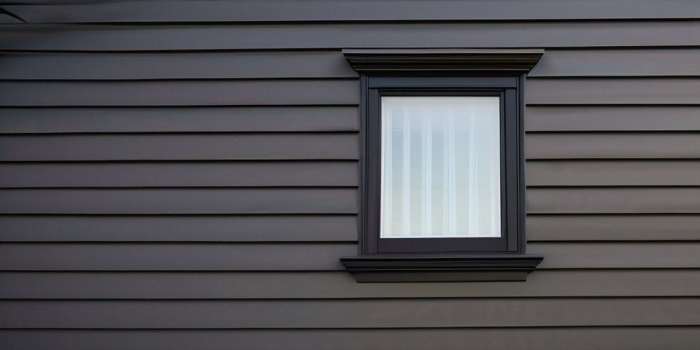
Source: wepaintsiding.com
Proper surface preparation is the key to a long-lasting, beautiful paint job on your aluminum siding. Skipping this crucial step can lead to peeling, chipping, and an overall unsatisfactory finish, wasting both your time and money. Taking the time to thoroughly clean and prepare the surface ensures the paint adheres properly and provides maximum protection.
Surface preparation involves several key steps, each contributing to the outcome. A well-prepared surface allows for better paint adhesion, resulting in a more durable and attractive finish. Neglecting any of these steps can significantly reduce the lifespan of your paint job.
Cleaning Aluminum Siding
Cleaning your aluminum siding removes dirt, grime, mildew, and other contaminants that can interfere with paint adhesion. Start by rinsing the siding with a garden hose to remove loose debris. For tougher stains, a solution of mild detergent and water is usually sufficient. Apply the solution using a soft-bristled brush or a long-handled sponge, scrubbing gently to avoid scratching the surface. Rinse thoroughly again with clean water to remove all traces of the cleaning solution. For stubborn mildew, a solution of one part bleach to three parts water can be effective, but always test it in an inconspicuous area first. Remember to wear protective gloves and eye protection when working with bleach. Allow the siding to dry completely before proceeding to the next step.
Repairing Damaged Areas
Before painting, inspect your aluminum siding for any damage such as dents, scratches, or holes. Small dents can often be carefully pushed out from the back using a rubber mallet and a block of wood to avoid further damage. Scratches can be filled with an aluminum-compatible caulk or filler, ensuring a smooth surface. Larger holes or significant damage might require replacement panels. Repairing these areas before painting prevents them from becoming more noticeable after the paint is applied, resulting in a more professional-looking finish.
Removing Old Paint and Loose Debris
If you’re repainting aluminum siding that already has a coat of paint, it’s crucial to remove any loose or peeling paint. Use a scraper to gently remove flaking paint, being careful not to scratch the underlying aluminum. A wire brush can help remove stubborn paint, but use it cautiously to avoid damaging the surface. After removing loose paint, use a pressure washer (with a low-pressure setting) to remove any remaining loose debris. Always maintain a safe distance from the siding to prevent damage. Finally, wipe down the surface with a clean cloth to remove any dust or particles. Remember to wear appropriate safety gear during this process.
Choosing the Right Color and Finish
Picking the right color and finish for your aluminum siding paint is crucial for both aesthetics and longevity. The color you choose will significantly impact your home’s curb appeal, while the finish affects how the paint holds up against the elements. Let’s explore how to make informed decisions in both areas.
Color selection is highly personal, but considering your home’s architectural style, surrounding landscape, and personal preferences is key. Neutral tones offer versatility and timeless appeal, while bolder colors can create a striking statement. The finish, however, plays a more technical role in the paint’s performance.
Color Palettes for Aluminum Siding
Several color palettes work well with aluminum siding. Consider these examples to spark your creativity:
- Classic Neutrals: Think soft grays, creamy whites, and subtle beiges. These colors create a clean, timeless look that complements most architectural styles and landscaping.
- Earthy Tones: Warm browns, muted greens, and terracotta shades evoke a natural, inviting feel. These colors work particularly well with homes surrounded by greenery.
- Cool Blues and Greens: These shades create a calming, refreshing atmosphere, especially suitable for homes near water or in cooler climates.
- Modern Monochromatic Schemes: Using varying shades of a single color, like different tones of gray or blue, creates a sophisticated and cohesive look.
Impact of Different Finishes, What is the best paint for aluminum siding
The finish of your paint significantly impacts its durability and appearance. Gloss, satin, and matte finishes each have distinct properties:
- Gloss: Offers excellent durability and washability. It’s highly resistant to scratches and fading, but can highlight imperfections in the surface. It also reflects more light, making the color appear brighter and more vibrant.
- Satin: Provides a good balance between durability and a softer, less reflective appearance. It’s easier to clean than matte finishes and offers decent resistance to scratches and fading. It’s a popular choice for its versatility.
- Matte: Offers the least sheen and best hides imperfections. However, it’s less durable and more prone to staining and scratches than gloss or satin finishes. It’s generally best suited for areas with less wear and tear.
Visual Comparison of Finishes
Imagine three identical aluminum siding panels, each painted the same color (e.g., a medium gray). The first panel has a high-gloss finish; it looks very shiny, reflecting light strongly, and any minor imperfections in the siding are visible. The second panel has a satin finish; it has a subtle sheen, looking smooth and elegant, with imperfections less noticeable than on the gloss panel. The third panel has a matte finish; it appears almost flat, with no shine; imperfections are almost completely hidden, giving it a more subdued appearance. The color on the matte panel might appear slightly less vibrant compared to the gloss and satin finishes due to less light reflection.
Application Techniques and Tools: What Is The Best Paint For Aluminum Siding

Source: wepaintsiding.com
Painting aluminum siding requires the right techniques and tools to achieve a professional-looking finish. Proper application ensures even coverage, prevents drips and streaks, and maximizes the paint’s lifespan. Choosing the right method depends on the size of the area and your comfort level with different tools.
Applying paint evenly is crucial for a lasting, attractive finish. Uneven application can lead to premature peeling and a less aesthetically pleasing result. Regardless of the method you choose, the key is consistent, controlled movements and the right amount of paint.
Brush Application
Using a brush is ideal for detailed areas, trim, and corners where a roller or sprayer might struggle. A high-quality angled brush, typically 2-3 inches wide, is best suited for this task. Load the brush with paint, ensuring it’s not overloaded to avoid drips. Apply the paint in thin, even strokes, overlapping each stroke slightly to prevent streaks. Work in small sections, ensuring complete coverage before moving on. Allow each coat to dry completely before applying the next. For a smooth finish, use long, even strokes in the direction of the siding.
Roller Application
Rollers are efficient for covering large, flat areas of aluminum siding. A high-quality roller with a nap length suitable for siding is essential. A 9-inch roller is a good choice for most jobs. Pour a moderate amount of paint into a paint tray. Load the roller by rolling it back and forth in the tray, ensuring even paint distribution. Apply the paint in smooth, even strokes, overlapping each stroke by about half the roller’s width. Avoid excessive pressure to prevent paint from being forced into seams. Work in manageable sections, ensuring even coverage before moving to the next. Allow each coat to dry completely before applying the next.
Sprayer Application
Sprayers offer the fastest method for covering large areas but require more preparation. An airless sprayer is commonly used for exterior painting projects. Thin the paint according to the manufacturer’s instructions, as aluminum siding often requires a thinner consistency for even spraying. Maintain a consistent distance from the siding (typically 12-18 inches) and a steady pace to avoid runs and drips. Overlapping spray passes by about 50% ensures even coverage. Clean the sprayer thoroughly after use to prevent clogging. Remember to protect surrounding areas from overspray using drop cloths or masking tape.
Necessary Tools and Materials
Before you begin, gather the necessary tools and materials. This ensures a smooth and efficient painting process. Proper preparation prevents delays and ensures a high-quality finish.
- Aluminum siding cleaner and degreaser
- Primer specifically designed for aluminum siding (if needed)
- Exterior paint formulated for aluminum siding
- Paintbrushes (angled brushes for trim and details)
- Paint rollers and trays (9-inch roller recommended)
- Paint sprayer (optional, for large areas)
- Painter’s tape (to mask off areas)
- Drop cloths or plastic sheeting
- Putty knife or scraper (for removing loose paint)
- Sandpaper (for smoothing rough surfaces)
- Safety glasses and gloves
- Ladder (if necessary)
Avoiding Common Painting Mistakes
Several common mistakes can lead to an unsatisfactory paint job. Understanding these issues helps you avoid them and achieve a professional finish. Careful preparation and proper application techniques are key to preventing these problems.
- Streaks: Caused by uneven paint application or insufficient overlap. Use long, even strokes with a brush or roller, and ensure adequate overlap between strokes.
- Drips: Result from overloading the brush or roller, or using too thick paint. Apply paint in thin coats and avoid excessive pressure.
- Uneven Coverage: Caused by insufficient paint application or using the wrong tools. Use the appropriate tools for the job and ensure complete coverage in each section before moving on. Apply multiple thin coats rather than one thick coat.
- Lap Marks: Visible lines where one coat of paint overlaps another. To minimize lap marks, work quickly and smoothly, maintaining a wet edge. Use a high-quality roller and maintain consistent pressure.
Maintenance and Longevity
Source: wepaintsiding.com
Keeping your freshly painted aluminum siding looking its best and extending its lifespan requires a proactive approach. Regular maintenance prevents damage and ensures your investment lasts for years. Factors like weather exposure and cleaning methods significantly impact how long your paint job holds up.
Proper care is key to maximizing the lifespan of your paint job. Neglect can lead to premature fading, chipping, and peeling, necessitating costly repainting sooner than expected. Understanding the impact of environmental factors and employing appropriate cleaning techniques are crucial for maintaining the aesthetic appeal and structural integrity of your siding.
Environmental Factors Affecting Paint Lifespan
Weather plays a dominant role in the longevity of exterior paint. Harsh sunlight, intense heat, freezing temperatures, and frequent rain or snow can all accelerate paint degradation. UV rays from the sun break down the paint’s polymer structure, leading to fading and chalking. Extreme temperature fluctuations cause expansion and contraction of the aluminum siding, potentially stressing the paint film and causing cracking or peeling. Constant exposure to moisture can lead to mildew growth, further compromising the paint’s integrity. Coastal areas, with their salt spray, face even greater challenges, as salt accelerates corrosion and paint deterioration. For example, a house in a Florida coastal town might require repainting every 5-7 years due to intense sun and salt spray, while a house in a milder climate might last 10-15 years.
Recommended Cleaning and Maintenance Practices
Regular cleaning is essential for preventing dirt, grime, and mildew from accumulating on the painted surface. A gentle solution of mild detergent and water, applied with a soft-bristled brush or sponge, is usually sufficient. Avoid using high-pressure washers, as they can damage the paint film. Rinse thoroughly with clean water after cleaning. For stubborn mildew stains, a solution of bleach and water (always following product instructions carefully) can be effective, but be sure to test it in an inconspicuous area first. Annual cleaning, at minimum, is recommended, with more frequent cleaning in areas with heavy pollution or tree pollen. Inspect the siding regularly for any signs of damage, such as chips, cracks, or peeling paint, and address these issues promptly to prevent further deterioration.
Signs Indicating the Need for Repainting
Several visual cues indicate it’s time for a repaint. Significant fading, where the color has noticeably lightened, is a clear sign. Chalking, a powdery residue on the surface, indicates the paint is breaking down. Peeling or blistering paint shows adhesion failure and requires immediate attention. Cracking or chipping paint compromises the protective layer, exposing the aluminum siding to the elements. The presence of extensive mildew, despite regular cleaning, also suggests a need for repainting. If you notice any of these issues, it’s best to consult a professional painter to assess the damage and determine the best course of action. Ignoring these signs can lead to more extensive and costly repairs down the line.
Environmental Considerations
Painting your aluminum siding might seem like a purely aesthetic choice, but the paints you select have a significant environmental footprint. Choosing wisely means considering the impact of different paint types on air and water quality, as well as responsible disposal of leftover materials. Let’s explore how to minimize the environmental consequences of your painting project.
Choosing environmentally friendly paints is crucial for reducing your impact on the environment. The type of paint used directly influences air and water pollution levels, affecting both the local ecosystem and the global climate. Understanding the VOC content (Volatile Organic Compounds) of different paints is a key step in making an informed decision.
Environmentally Friendly Paint Options
Several paint types offer lower environmental impact compared to traditional options. Low-VOC or zero-VOC paints significantly reduce harmful emissions during application and drying. Water-based acrylic paints are generally a good choice, as they release fewer VOCs than oil-based paints. Look for paints certified by organizations like Green Seal or the EPA’s Safer Choice program for assurance of lower environmental impact. These certifications verify that the paint meets specific standards for reduced toxicity and VOC content. For example, a Green Seal certified paint might have a VOC content of less than 50 grams per liter, significantly lower than many conventional oil-based paints which can exceed 250 g/L.
Impact of Different Paint Types on the Environment
Oil-based paints, while durable, release high levels of VOCs, contributing to smog formation and air pollution. These VOCs can also impact water quality if runoff from rain carries them into waterways. Water-based acrylic paints, on the other hand, have much lower VOC emissions, making them a more environmentally responsible option. Powder coatings, applied electrostatically, offer another environmentally friendly alternative, as they produce little to no VOCs and generate less waste than liquid paints. However, their application requires specialized equipment. The choice between these options depends on factors like budget, desired finish, and access to specialized application techniques.
VOC Content Comparison of Different Paint Types
VOC content is a critical factor to consider. Generally, oil-based paints have significantly higher VOC content (often exceeding 250 g/L) than water-based acrylic paints (typically under 50 g/L). Zero-VOC paints, as their name suggests, have virtually no detectable VOC emissions. However, even within categories, VOC content varies widely depending on the specific paint formulation and manufacturer. Always check the product label for precise VOC information. For instance, comparing two different brands of acrylic exterior paints, one might contain 20 g/L VOCs, while another might contain 40 g/L, illustrating the importance of detailed label review.
Disposal Methods for Leftover Paint and Cleaning Materials
Proper disposal of leftover paint and cleaning supplies is essential for environmental protection. Never pour paint down the drain or into the trash. Many communities offer hazardous waste collection days or permanent drop-off centers for paint disposal. Check with your local waste management department for specific guidelines and locations. Leftover paint can often be reused for touch-ups, or some recycling programs accept usable leftover paint for repurposing. For cleaning materials, follow product instructions for safe disposal. Water-based cleaning solutions can often be safely diluted and poured down the drain, but check product labels to confirm. Oil-based cleaning solvents require special disposal procedures and should be taken to a hazardous waste facility.
Final Thoughts
Painting aluminum siding successfully hinges on selecting the right paint, meticulously preparing the surface, and employing the correct application techniques. By following the steps outlined in this guide, you can transform your home’s exterior with a fresh coat of paint that not only enhances its curb appeal but also protects it from the elements for years to come. Remember to always prioritize safety and environmental responsibility when choosing your paint and disposal methods. Now go get painting!
Common Queries
Can I paint aluminum siding in cold weather?
It’s best to avoid painting in cold temperatures (below 50°F/10°C) as the paint won’t dry properly and may crack or peel.
How long does aluminum siding paint last?
With proper preparation and maintenance, a good quality paint job on aluminum siding can last 5-10 years, or even longer.
Do I need a primer for aluminum siding?
While not always strictly necessary, a primer can improve paint adhesion, especially on older or weathered siding. A good quality paint often includes a primer.
What’s the best way to clean painted aluminum siding?
Use a soft brush, mild detergent, and water. Avoid harsh chemicals or pressure washers that can damage the paint.
How do I deal with peeling paint on aluminum siding?
Scrape off loose paint, clean the surface thoroughly, and then apply a bonding primer before repainting.
Comments are closed.