How to Install Steel Siding on a House
How to install steel siding on a house? It might sound daunting, but with the right preparation and technique, it’s an achievable DIY project (or a manageable job for a contractor). This guide walks you through each step, from planning and material selection to the final finishing touches, ensuring a weatherproof and stylish exterior for your home. We’ll cover everything from choosing the right siding type to mastering the art of panel installation and proper caulking. Get ready to transform your house’s curb appeal!
This project involves careful planning, accurate measurements, and attention to detail. We’ll cover the essential tools, safety precautions, and step-by-step instructions to make the process smoother. Understanding the different types of steel siding and their properties is crucial for making informed decisions. We’ll also discuss efficient methods for cutting and fastening panels, ensuring a professional-looking finish. Finally, we’ll highlight the importance of proper sealing and caulking to prevent water damage and ensure long-term durability.
Planning and Preparation

Source: storables.com
Installing steel siding is a significant undertaking, requiring careful planning and preparation to ensure a successful and long-lasting result. Proper preparation will save you time, money, and frustration down the line. This section Artikels the essential steps to get your project off to a strong start.
Necessary Tools and Materials
Gathering all the necessary tools and materials beforehand is crucial for efficient installation. Failing to do so will lead to delays and potential work stoppages. You’ll need a variety of tools, from basic hand tools to specialized equipment depending on the complexity of your project.
- Measuring tape (long enough to measure the entire wall height and width)
- Chalk line
- Level (at least 4 feet long)
- Drill with various drill bits (including those for metal)
- Screwdriver (both Phillips and flathead)
- Tin snips or shears
- Hammer
- Safety glasses
- Work gloves
- Ladder (tall enough to reach the highest point of the house)
- Scaffolding (for larger projects or two-story houses)
- Steel siding panels
- J-channel
- Flashing
- Fasteners (appropriate for steel siding)
- Caulk
- Underlayment (if required)
House Exterior Preparation Checklist
Before installing any siding, the house exterior must be thoroughly prepared. This ensures proper adhesion and prevents future problems.
- Remove existing siding, trim, and any damaged wood.
- Repair any damaged sheathing or underlying structure. This might involve replacing rotten wood or patching holes.
- Clean the exterior walls thoroughly. Remove dirt, debris, loose paint, and any other contaminants.
- Inspect for and repair any insect damage or water damage.
- Install any necessary vapor barriers or underlayment to protect the house from moisture.
- Ensure all windows and doors are properly sealed and weatherproofed.
Accurate Measurements
Accurate measurements are vital for a professional-looking finish and to avoid wasting materials. Incorrect measurements will lead to gaps, overlaps, and potentially unusable panels.
Measure all walls carefully, noting any irregularities or obstructions. Use a measuring tape and chalk line to mark the starting points for your siding installation. Double-check all measurements before cutting any materials. Consider using a laser level for increased accuracy, especially on larger projects. It’s always better to have extra material than to run short.
Steel Siding Comparison, How to install steel siding on a house
| Profile | Gauge | Coating | Description |
|---|---|---|---|
| Vertical Panel | 26 | Kynar 500® | A classic, durable choice offering excellent protection against the elements. The Kynar coating provides exceptional color retention and resistance to fading. |
| Horizontal Panel | 24 | Galvalume® | Provides a traditional look. The 24-gauge steel offers slightly more strength than 26-gauge. Galvalume is a zinc-aluminum alloy providing corrosion resistance. |
| Shake/Shingle | 26 | Polyester | Mimics the look of wood shakes, offering a more rustic aesthetic. Polyester coatings are generally less expensive than Kynar but offer good protection. |
| Board and Batten | 24 | PVDF | A contemporary style with vertical panels and wider battens. PVDF coatings provide exceptional durability and UV resistance. |
Installing the Sheathing and Flashing
Getting the sheathing and flashing right is crucial for a long-lasting, watertight steel siding installation. This step ensures your siding isn’t just aesthetically pleasing but also protects your home from the elements for years to come. We’ll cover installing the underlayment, flashing around openings, and securing everything for a watertight seal.
Underlayment Installation
Proper underlayment acts as a crucial barrier against moisture, protecting your home’s structure and the steel siding itself. Choosing the right type of underlayment depends on your climate and budget. Common options include felt paper, housewrap, and more advanced breathable membranes. Regardless of your choice, consistent overlap and proper fastening are essential. Start at the bottom of the wall and work your way up, overlapping each sheet according to the manufacturer’s instructions – typically 6 inches. Secure the underlayment with staples or nails, ensuring a tight fit against the sheathing. Avoid stretching the underlayment, as this can compromise its effectiveness. Remember to seal any gaps or seams with waterproof tape to create a complete moisture barrier.
Flashing Installation Around Windows and Doors
Flashing around windows and doors prevents water from penetrating these vulnerable areas. This involves using flashing materials, usually aluminum or galvanized steel, to create a watertight seal. Before installing the flashing, ensure the window and door frames are properly installed and sealed. The flashing should be installed in layers, starting with a base flashing that sits on the sheathing, extending up and over the window or door frame. A second layer of flashing should then be installed over the first, creating an overlap to direct water away from the opening. Use sealant around all edges to ensure a completely watertight seal. Remember to carefully cut and bend the flashing to fit the contours of the window or door frame. Improper flashing can lead to leaks and costly repairs.
Watertight Seals at Critical Points
Achieving watertight seals requires meticulous attention to detail. Pay special attention to all seams, corners, and areas where different materials meet. Use high-quality sealant, such as butyl tape or silicone caulk, to seal all gaps and overlaps. These sealants provide a flexible and durable barrier against water intrusion. Before applying sealant, ensure the surfaces are clean and dry for optimal adhesion. For larger gaps, consider using backer rod to create a consistent depth for the sealant. This ensures a full and even bead of sealant, maximizing its effectiveness. Remember to always follow the manufacturer’s instructions for proper application and drying times.
Sheathing Cutting and Fastening
Accurate cutting and proper fastening of the sheathing is essential for a smooth, even surface for the steel siding. Use a sharp utility knife or circular saw to cut the sheathing to the required dimensions. Always wear appropriate safety gear, including gloves and eye protection. Fasten the sheathing using appropriate nails or screws, ensuring they are driven straight and flush with the surface. Spacing between fasteners should be consistent and follow manufacturer recommendations. Improper fastening can lead to gaps and potential water penetration. Consider using a pneumatic nail gun for faster and more efficient fastening. Pre-drilling pilot holes for screws can prevent splitting the sheathing.
Installing the Steel Siding Panels

Source: houseplans. blog
Now that the sheathing and flashing are in place, you’re ready to install the steel siding panels. This is where the project starts to take shape. Remember to always wear appropriate safety gear, including gloves and safety glasses.
Installing the first panel is crucial for establishing a straight and level line for the rest of the installation. Proper alignment at the start prevents problems later on. This process involves aligning the panel with the bottom edge of the J-channel, ensuring it’s perfectly plumb and level before securing it.
Starting the First Panel
Begin at a corner, usually the most visible one. Position the first panel, ensuring it’s flush with the bottom edge of the pre-installed J-channel. Use a level to verify that the panel is perfectly plumb and level. Secure the panel temporarily using self-drilling screws, placed approximately every 12 inches along the top and bottom edges. Don’t fully tighten them yet, as you might need to make minor adjustments. Once you’re satisfied with the alignment, fully tighten all screws.
Overlapping and Securing Panels
Steel siding panels are installed with an overlap, usually specified by the manufacturer’s instructions (typically around 1/2 inch to an inch). This overlap ensures a weathertight seal. Each subsequent panel should overlap the previously installed panel. Align the edges carefully and secure the panel using self-drilling screws, following the manufacturer’s recommended spacing (usually around 12 inches). Remember to always maintain consistent spacing to create a uniform look and ensure proper fastening. Before fully driving the screws, ensure the panels are aligned correctly to avoid any gaps or misalignments.
Cutting Panels for Corners and Obstacles
You’ll likely need to cut panels to fit around corners, windows, doors, and other obstacles. Use tin snips or a metal-cutting saw to make precise cuts. Measure carefully to ensure a perfect fit. Remember to always wear safety glasses when cutting metal. For inside corners, use an inside corner trim. For outside corners, use outside corner trim. These trims will neatly cover the cut edges and provide a finished look.
Installing J-Channel and Trim
A step-by-step guide with image descriptions follows:
- Image 1: Measuring and Cutting J-Channel. This image shows someone measuring the length of J-channel needed for a particular section of the house, then using tin snips to cut it to size. The person is using a measuring tape and ensuring the cut is clean and straight. The image emphasizes precise measurement and careful cutting to avoid waste and ensure a proper fit.
- Image 2: Installing J-Channel. The image shows the J-channel being nailed or screwed securely to the sheathing. The image highlights the importance of using the correct fasteners and spacing to ensure the J-channel is securely attached and will provide a strong base for the siding. The J-channel is perfectly aligned and straight, showing proper installation technique.
- Image 3: Measuring and Cutting Trim. Similar to the J-channel, this image depicts someone measuring and cutting trim pieces to fit around windows or doors. The image focuses on the precision required for neat and professional-looking results. It also shows how to use a miter saw for precise angled cuts, particularly necessary for corner trims.
- Image 4: Installing Trim. This image shows the trim being carefully fitted and fastened around the window or door. It emphasizes the importance of proper alignment and secure fastening to prevent gaps or movement. The image shows the final, neat, and finished look achieved with correctly installed trim.
- Image 5: Installing Corner Trim. This image displays the installation of outside corner trim. The image showcases how the two pieces of trim perfectly meet at the corner, creating a sharp and clean finish. The image highlights the use of appropriate fasteners and even spacing to ensure the trim is properly secured and aligned.
Remember to always consult the manufacturer’s instructions for your specific steel siding product for detailed guidance and recommendations. They often provide helpful diagrams and specifications to ensure a successful installation.
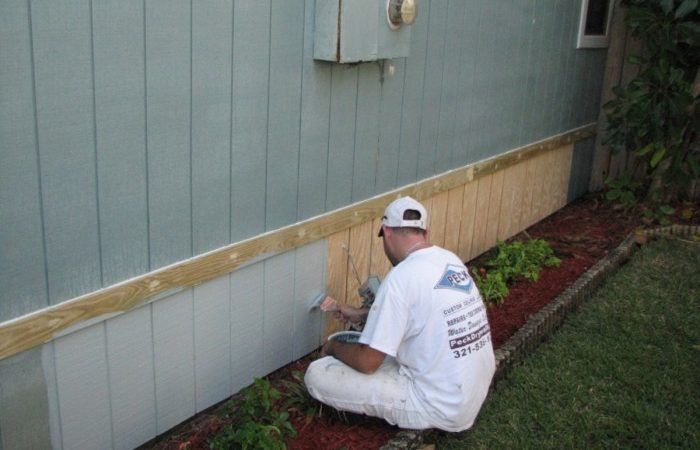
Finishing Touches and Caulking

Source: storables.com
The final steps in installing steel siding are crucial for ensuring a long-lasting, weather-tight, and aesthetically pleasing finish. Proper caulking and installation of finishing trim prevent water damage and enhance the overall look of your home’s exterior. Neglecting these details can lead to costly repairs down the road.
Caulking is essential for sealing gaps and preventing water infiltration. It creates a waterproof barrier between the siding panels, trim, and other building components. Choosing the right caulking material is key to its effectiveness.
Suitable Caulking Materials
Several caulking materials are suitable for use with steel siding, each with its advantages and disadvantages. The choice depends on factors like temperature extremes, exposure to UV rays, and the specific application. Always select a high-quality, paintable caulk designed for exterior use.
- Silicone Caulk: Excellent for flexibility and weather resistance. It’s a good choice for areas that experience significant temperature fluctuations. However, it can be difficult to paint over.
- Acrylic Latex Caulk: Easier to paint than silicone, and offers good adhesion and flexibility. It’s a popular choice for many applications, but may not be as durable in extreme weather conditions.
- Butyl Rubber Caulk: Offers exceptional durability and weather resistance, making it ideal for areas exposed to harsh weather. However, it can be more difficult to apply and is less paintable than other options.
Installing Finishing Trim and Accessories
Finishing trim, such as J-channel, corner trim, and window and door trim, provides a neat and professional finish to your steel siding installation. It covers raw edges, protects the siding from damage, and enhances the overall aesthetic appeal. Proper installation involves precise measuring, cutting, and fastening the trim pieces securely to the sheathing. Use appropriate fasteners designed for exterior use and be sure to maintain consistent spacing between fasteners. Always refer to the manufacturer’s instructions for specific installation details.
Potential Problems and Solutions
Careful planning and attention to detail can minimize problems during installation, but some issues may still arise. Being prepared to address them effectively will ensure a successful project.
- Gaps between panels: Ensure proper alignment and overlapping of panels during installation. If gaps occur, carefully remove and reposition the panels. Use appropriate shims if necessary.
- Damaged panels: Handle panels with care to avoid scratches or dents. Replace any damaged panels immediately. Inspect each panel carefully before installation.
- Improper caulking: Use a high-quality caulk designed for exterior use. Apply a smooth, continuous bead, ensuring complete coverage of gaps and joints. Avoid gaps or thin areas in the caulk application.
- Loose fasteners: Use the correct fasteners for your siding and sheathing. Overtightening can damage the siding. Undertightening can lead to loose panels and water infiltration. Check and tighten any loose fasteners as needed.
- Uneven siding: Ensure your sheathing is properly installed and level before installing the siding. Use shims as needed to create a level surface. Inspect regularly to maintain even spacing and alignment.
Safety Precautions
Steel siding installation presents several potential hazards, demanding a rigorous approach to safety. Ignoring these risks can lead to serious injuries or even fatalities. This section contains crucial safety measures to protect yourself and your crew throughout the project.
Working with steel siding involves sharp edges, heavy materials, and often, working at significant heights. Understanding and mitigating these risks is paramount to a successful and safe installation.
Potential Hazards During Steel Siding Installation
Sharp edges and points on steel siding panels and trim pieces can cause cuts and lacerations. Falling from heights while working on ladders or scaffolding is a major concern. The weight of the siding and other materials can cause strains, sprains, or crushing injuries if handled improperly. Exposure to the elements, such as sun and rain, can also lead to heatstroke or hypothermia. Finally, improper handling of power tools can result in serious injuries.
Safety Guidelines for Working at Heights
Working at heights requires strict adherence to safety protocols. Always use appropriate fall protection equipment, such as harnesses and safety lines, when working above 6 feet. Ensure scaffolding is properly erected and inspected before use, and always maintain three points of contact when climbing ladders. Never overload scaffolding or ladders, and always be mindful of overhead power lines. Consider using a safety harness attached to a secure anchor point on the roof or building when working on steep roofs.
Safety Checklist for Workers
Before commencing work, each worker should complete a safety checklist. This checklist should include verifying the stability of ladders and scaffolding, checking the condition of all personal protective equipment (PPE), confirming the presence of fall protection equipment where necessary, ensuring that the work area is clear of obstructions, and confirming that all tools are in good working order. The checklist should be signed and dated by each worker before they begin their tasks. Regular inspections throughout the project are also vital to maintain safety standards.
Proper Use of Personal Protective Equipment (PPE)
Personal Protective Equipment (PPE) is essential for protecting workers from various hazards. Safety glasses or goggles protect eyes from flying debris. Work gloves prevent cuts and abrasions from sharp edges. Hearing protection is crucial when using power tools. Steel-toe boots protect feet from falling objects or heavy materials. A hard hat protects the head from falling objects. When working at heights, a full-body harness and safety line are mandatory. The proper selection and use of PPE is non-negotiable and crucial to worker safety. Regular inspection and maintenance of PPE is equally important to ensure its effectiveness.
Final Wrap-Up: How To Install Steel Siding On A House
Installing steel siding is a rewarding experience that significantly enhances your home’s value and aesthetics. By following the steps outlined in this guide, you’ll be well-equipped to tackle this project confidently. Remember, careful planning, precise measurements, and attention to detail are key to a successful installation. Don’t forget the importance of safety precautions throughout the entire process. With a little patience and the right approach, you’ll soon be admiring your newly sided home, knowing you accomplished it yourself (or expertly managed the contractor!).
Clarifying Questions
What’s the lifespan of steel siding?
With proper installation and maintenance, steel siding can last 30-50 years or even longer.
Can I install steel siding over existing siding?
Sometimes, but it depends on the condition of the existing siding. It’s often best to remove old siding for a better, more secure installation.
How much does steel siding cost?
The cost varies greatly depending on the type of siding, the size of your house, and labor costs. Get multiple quotes for accurate pricing.
Do I need a permit to install steel siding?
Check with your local building department; permits are often required for exterior renovations.
What’s the best time of year to install steel siding?
Moderate temperatures (avoid extreme heat or cold) are ideal for optimal adhesion and workability of materials.
Comments are closed.