Good Paint for Aluminum Siding A Complete Guide
Good paint for aluminum siding isn’t just about aesthetics; it’s about protecting your home’s exterior from the elements and maintaining its value. Choosing the right paint requires understanding different paint types, their properties, and the proper application techniques. This guide will walk you through everything you need to know, from surface preparation to choosing the perfect color and sheen, ensuring a long-lasting and beautiful finish.
We’ll cover various paint types, including acrylics and epoxies, comparing their durability, weather resistance, and cost. We’ll also delve into surface preparation, emphasizing the importance of cleaning and priming. Proper application techniques, using brushes, rollers, or sprayers, will be detailed, along with tips for avoiding common mistakes. Finally, we’ll discuss color and sheen selection, maintenance strategies, and crucial safety precautions to keep you safe throughout the process.
Types of Paint Suitable for Aluminum Siding
Source: familyhandyman.com
Choosing the right paint for your aluminum siding is crucial for long-lasting protection and aesthetic appeal. Aluminum siding, while durable, needs a paint that adheres well and withstands the elements. The wrong paint can lead to peeling, chipping, and even damage to the siding itself. Understanding the properties of different paint types is key to making an informed decision.
Paint Types and Their Properties
Selecting the appropriate paint for your aluminum siding involves considering several factors, including durability, weather resistance, and cost. The following table summarizes the characteristics of common paint types used for this purpose.
| Paint Type | Durability | Weather Resistance | Cost |
|---|---|---|---|
| Acrylic Latex | Good to Excellent (depending on quality) | Good to Excellent (depending on quality and primer use) | Moderate |
| 100% Acrylic | Excellent | Excellent | High |
| Epoxy | Excellent | Excellent | High |
| Alkyd (Oil-Based) | Good | Good | Moderate |
Advantages and Disadvantages of Different Paint Types
Each paint type offers a unique set of advantages and disadvantages when applied to aluminum siding.
Acrylic latex paints are a popular choice due to their ease of application, relatively low cost, and good durability. However, their weather resistance can be less than ideal compared to other options, especially in harsh climates. Higher-quality acrylic latex paints, and especially 100% acrylic paints, offer significantly improved durability and weather resistance.
Epoxy paints provide superior adhesion and durability, making them ideal for areas exposed to extreme weather conditions. They offer excellent protection against chipping and peeling, but are typically more expensive and require more careful application.
Alkyd (oil-based) paints offer good durability and weather resistance, but they have a longer drying time and stronger odor than water-based paints. They also contain volatile organic compounds (VOCs), which are harmful to the environment and human health. Therefore, their use is less prevalent than water-based options.
Water-Based versus Oil-Based Paints
Water-based paints (like acrylic latex) are generally preferred for aluminum siding due to their low VOC content, making them environmentally friendly and easier to clean up. They also tend to dry faster and are easier to apply than oil-based paints. However, oil-based paints (alkyds) traditionally offered superior durability and weather resistance, although this gap is narrowing with advancements in water-based paint technology. The choice ultimately depends on budget, environmental concerns, and the desired level of protection. For instance, in a coastal area with harsh sun and salty air, a higher-quality acrylic or epoxy paint might be a better investment than a standard acrylic latex paint. In a milder climate with less extreme weather, a good quality acrylic latex paint may be sufficient.
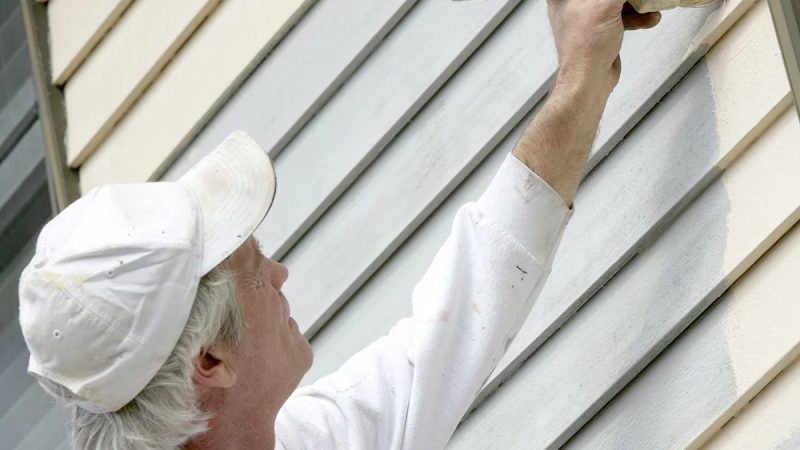
Surface Preparation for Painting Aluminum Siding
Proper surface preparation is crucial for a long-lasting, attractive paint job on your aluminum siding. Neglecting this step can lead to peeling, chipping, and an overall unsatisfactory finish. A well-prepared surface ensures the paint adheres properly, maximizing its lifespan and enhancing the aesthetic appeal of your home. This involves a multi-step process that focuses on cleaning, priming, and addressing any imperfections in the siding.
Preparing aluminum siding for painting requires meticulous attention to detail. Using the wrong cleaning agents or improper techniques can damage the siding’s delicate surface. Similarly, skipping crucial steps like priming or repair work can compromise the paint’s durability and appearance. Let’s delve into the necessary steps for optimal results.
Cleaning Aluminum Siding
Thorough cleaning removes dirt, grime, mildew, and any loose paint, creating a clean surface for better paint adhesion. This is the foundational step before any other preparation work. Failure to adequately clean the siding will result in a poor paint job. Use a pressure washer with a low-pressure nozzle to avoid damaging the siding. For stubborn stains, a solution of mild detergent and water, applied with a soft-bristled brush, can be effective. Always rinse thoroughly with clean water afterward.
- Begin by rinsing the entire siding surface with a garden hose to remove loose debris.
- Mix a solution of mild detergent (like dish soap) and water in a bucket. Avoid harsh chemicals.
- Using a soft-bristled brush or sponge, gently scrub the siding, paying attention to areas with dirt buildup or mildew.
- Rinse the siding thoroughly with clean water, ensuring all soap residue is removed.
- Allow the siding to dry completely before proceeding to the next step.
Repairing Damaged Aluminum Siding
Addressing imperfections like scratches and dents before painting is essential for a smooth, even finish. These imperfections, if left unaddressed, can show through the paint and detract from the overall appearance. Repairing these areas ensures a professional-looking final product.
- Scratches: For minor scratches, lightly sand the affected area with fine-grit sandpaper to smooth the surface. Clean the area thoroughly to remove any sanding dust before painting.
- Dents: For dents, carefully use a putty knife to gently coax the dented area back into place. For deeper dents, aluminum siding repair kits containing specialized filler are available. Follow the manufacturer’s instructions carefully to apply and smooth the filler, ensuring it blends seamlessly with the surrounding surface. Once dry, sand the area smooth with fine-grit sandpaper.
- After repairs, prime the repaired areas with an aluminum-specific primer to ensure proper adhesion of the topcoat paint. This prevents the repaired area from being noticeable after painting.
Priming Aluminum Siding
Priming acts as a bonding agent between the aluminum siding and the paint. It improves adhesion, provides a uniform surface for the paint to adhere to, and prevents corrosion. Skipping the primer can result in premature paint failure. Always choose a primer specifically formulated for aluminum or metal surfaces.
Using the correct primer is crucial for a successful paint job.
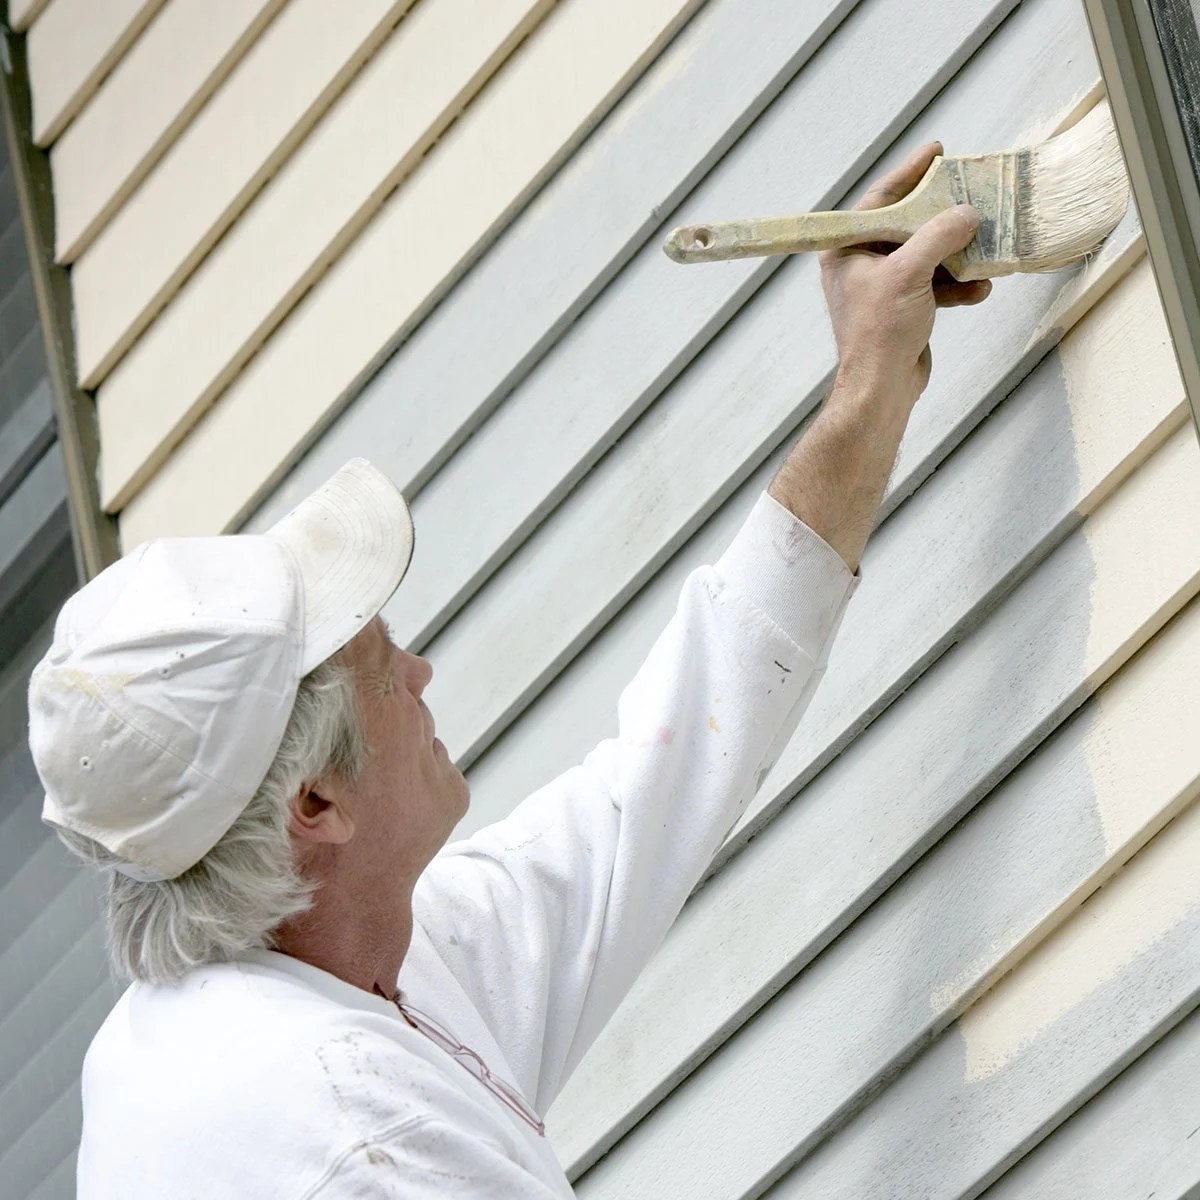
Application Methods and Techniques
Source: prosuperiorconstruction.com
Painting aluminum siding successfully hinges on choosing the right application method and mastering the techniques for a professional-looking finish. The method you select will impact both the speed of the job and the final appearance. Let’s explore the most common options and their nuances.
Paint Application Methods Compared
Choosing the right tool depends on your project’s size, your comfort level, and the desired finish. Each method has its advantages and drawbacks. Consider these factors carefully before you begin.
| Method | Pros | Cons |
|---|---|---|
| Brush | Excellent control, ideal for intricate areas and trim, allows for easy blending, relatively inexpensive. | Labor-intensive, can leave brush strokes if not applied correctly, slower application rate. |
| Roller | Faster coverage than brushing, good for large, flat surfaces, relatively inexpensive. | May not reach all crevices and corners easily, can leave roller marks if not applied properly, requires a paint tray. |
| Sprayer (HVLP or Airless) | Fastest application method, provides a very smooth finish, ideal for large areas. | More expensive equipment, requires more cleanup, potential for overspray and runs if not used correctly, may require more safety precautions due to overspray and potential inhalation of paint particles. |
Tips for Achieving a Smooth, Even Finish
Preparation is key to a flawless finish. Ensure the siding is thoroughly cleaned and primed before painting. For brushing or rolling, maintain a wet edge to prevent lap marks. This means overlapping each stroke slightly while the paint is still wet. Work in small sections to avoid the paint drying before you can blend it. For spraying, maintain a consistent distance from the surface and a uniform spray pattern to avoid runs and drips. Multiple thin coats are always preferable to one thick coat, which can lead to drips, runs, and uneven coverage.
Avoiding Common Painting Mistakes
Brush strokes are often caused by applying too much paint at once or not blending properly. Use a high-quality brush, load it lightly, and work with a wet edge. Drips and runs result from applying too much paint or working too quickly. Let the paint flow smoothly from the brush or roller, avoiding overloading your tools. Uneven coverage often stems from inadequate surface preparation or inconsistent application. Ensure the surface is clean, dry, and primed, and apply multiple thin coats to achieve uniform color and opacity. Using a back-and-forth technique when brushing or rolling can also help avoid noticeable strokes and achieve better coverage. Remember to allow adequate drying time between coats.
Choosing the Right Color and Sheen
Picking the perfect paint color and sheen for your aluminum siding is key to a beautiful and long-lasting finish. It’s about finding the right balance between your style, the architectural style of your home, and the practical considerations of the paint itself. Let’s explore how to make the best choices.
Color selection significantly impacts your home’s curb appeal. Consider your home’s architectural style – a traditional Victorian might look stunning in a deep, rich blue, while a modern ranch might be better suited to a clean, neutral gray. The surrounding environment also plays a role; a vibrant red might clash with the natural landscape, while a muted green might blend seamlessly. Ultimately, personal preference should guide your final decision, but keeping these factors in mind will help you narrow down your options and achieve a cohesive look.
Color Selection Considerations
Choosing a paint color involves more than just personal preference. The style of your house, the surrounding landscape, and even the amount of sunlight your house receives should all influence your decision. For example, a light color reflects sunlight, keeping your home cooler in warmer climates, while a darker color absorbs more heat. Think about how the color will interact with your landscaping, your roof color, and other exterior elements. Consider creating a mood board or using online tools that allow you to visualize different colors on a picture of your home.
Sheen Options and Their Suitability
Different paint sheens offer varying levels of durability, reflectivity, and aesthetic appeal. Matte, satin, semi-gloss, and gloss finishes each have their unique properties. Matte finishes have a flat, non-reflective surface that hides imperfections well, but they’re generally less durable and harder to clean. Satin finishes offer a slightly more reflective surface with good durability and cleanability. Semi-gloss finishes are even more durable and easier to clean, with a noticeable sheen. Gloss finishes are the most durable and easiest to clean, offering a high-gloss, reflective surface. For aluminum siding, satin or semi-gloss are usually recommended for their balance of durability, cleanability, and aesthetic appeal. A gloss finish might be too shiny for some homes, while a matte finish might not stand up to the elements as well.
Sheen Appearance Comparison
Imagine three identical sections of aluminum siding, each painted the same color but with a different sheen. The matte section would appear flat and almost velvety, minimizing the appearance of any surface imperfections. The satin section would have a subtle, soft sheen, giving a slightly smoother look. The semi-gloss section would have a noticeable shine, reflecting light more prominently, and appearing more polished. Finally, a gloss finish would be highly reflective, almost mirror-like, drawing attention to the surface and highlighting any imperfections.
Maintaining the Painted Aluminum Siding
Source: familyhandyman.com
Keeping your freshly painted aluminum siding looking its best requires a little regular care. By following a simple maintenance plan, you can significantly extend the life of your paint job and protect your home’s exterior. Neglecting maintenance can lead to premature paint failure, necessitating costly repainting sooner than expected.
Regular cleaning and protection from the elements are key to keeping your aluminum siding vibrant and damage-free. Think of it like caring for your car – a little attention goes a long way.
Cleaning and Protecting Painted Aluminum Siding
A proactive approach to cleaning will prevent dirt and grime from accumulating and damaging your paint. This is especially important in areas with heavy pollution, trees, or proximity to busy roads.
- Regular Washing: Wash your siding at least once or twice a year, more frequently if necessary, using a soft-bristled brush or sponge and a solution of mild detergent and water. Avoid harsh chemicals or abrasive cleaners that can scratch the surface. Rinse thoroughly with clean water.
- Spot Cleaning: Address spills or stains immediately. A quick wipe-down can prevent them from setting and requiring more aggressive cleaning later. For stubborn stains, try a mixture of baking soda and water, gently scrubbing with a soft brush.
- Pressure Washing (Caution): While pressure washing can be effective, use low pressure to avoid damaging the paint. Keep the nozzle at least a foot away from the surface and use a wide fan-shaped spray pattern. Always test a small, inconspicuous area first to ensure it doesn’t damage the paint.
- Seasonal Protection: In areas with harsh winters, consider applying a protective coating or sealant to help prevent moisture damage and cracking. This is particularly helpful in preventing peeling or blistering. Consult with a paint professional to determine the best sealant for your specific paint and climate.
Signs of Paint Deterioration and Remedial Actions
Recognizing the early signs of paint deterioration is crucial for timely intervention and preventing more extensive damage. Early detection allows for less invasive repairs and saves money in the long run.
- Chalking: A powdery residue on the paint surface indicates fading and breakdown of the binder. This usually requires repainting or recoating the affected areas.
- Peeling or Blistering: This signifies moisture trapped beneath the paint, often caused by poor surface preparation or inadequate sealing. The affected areas need to be scraped clean down to the bare aluminum, properly primed, and repainted.
- Cracking: Fine cracks in the paint can be caused by temperature fluctuations or underlying substrate problems. Repair involves scraping away cracked paint, priming, and repainting.
- Fading: Loss of color intensity is a natural process, accelerated by sun exposure. A fresh coat of paint is often the best solution to restore the vibrancy of your siding.
- Mildew or Mold: Dark spots or streaks indicate mildew or mold growth. Clean the affected areas with a mildew-removing solution according to the product instructions, then allow them to dry completely before repainting or applying a mildew-resistant sealant.
Safety Precautions During Painting
Painting aluminum siding, while improving your home’s curb appeal, involves potential hazards if safety isn’t prioritized. Proper preparation and adherence to safety guidelines are crucial for a successful and hazard-free painting project. This section details the necessary precautions to ensure your safety and the quality of your work.
Protecting yourself from potential hazards is paramount when working with paints and solvents. Always remember that even seemingly minor risks can escalate quickly without proper attention. Following manufacturer instructions for both the paint and safety equipment is non-negotiable.
Personal Protective Equipment
Appropriate personal protective equipment (PPE) is essential to minimize exposure to paint, solvents, and other potential hazards. This includes wearing eye protection, such as safety glasses or goggles, to prevent paint splashes or fumes from irritating or damaging your eyes. A respirator, specifically designed for paint fumes, is necessary to protect your lungs from inhaling harmful particles and vapors. Gloves, preferably made of nitrile or similar material resistant to paint and solvents, should be worn to protect your skin from irritation and chemical exposure. Finally, long-sleeved clothing and long pants provide an additional layer of protection against paint splatters and skin contact with chemicals. Remember to change your gloves and clothing if they become heavily soiled or saturated.
Ventilation and Workspace
Adequate ventilation is critical when working with paints and solvents, as many release volatile organic compounds (VOCs) that can be harmful if inhaled. Work in a well-ventilated area, ideally outdoors on a day with little to no wind. If working indoors, open windows and doors to maximize airflow, and consider using fans to help circulate air. Never work in an enclosed space with poor ventilation, as this significantly increases the risk of inhaling harmful fumes. If you are working in a confined space, it’s best to consult with a professional.
Potential Hazards and Mitigation, Good paint for aluminum siding
Several hazards are associated with painting aluminum siding. Falls from ladders are a significant concern. Always use a sturdy, appropriately sized ladder and ensure it is placed on a stable, level surface. Never overreach while on a ladder. For tall buildings, consider using scaffolding or hiring a professional painter. Skin irritation and allergic reactions can occur from contact with paints and solvents. Wearing appropriate PPE, as described above, significantly reduces this risk. Fire hazards exist due to the flammability of some paints and solvents. Keep paints and solvents away from open flames, sparks, and heat sources. Store them in a cool, dry place, away from ignition sources, and ensure proper disposal of waste materials according to local regulations. Eye injuries from paint splashes are preventable by wearing safety glasses or goggles. Finally, inhalation of paint fumes can cause respiratory problems. Using a respirator and ensuring adequate ventilation greatly reduces this risk.
Summary
Painting aluminum siding successfully hinges on careful planning and execution. By following the steps outlined in this guide – from selecting the appropriate paint type and preparing the surface correctly to applying the paint evenly and maintaining the finish – you can achieve a professional-looking result that enhances your home’s curb appeal and protects it for years to come. Remember, the right preparation and technique make all the difference in achieving a durable and attractive finish that stands the test of time. So grab your brushes, and let’s get started!
FAQs: Good Paint For Aluminum Siding
Can I paint aluminum siding myself, or should I hire a professional?
While you can DIY, hiring a professional guarantees a flawless finish, especially for large areas. Consider your skills and time constraints before deciding.
How long does aluminum siding paint typically last?
With proper preparation and high-quality paint, you can expect your aluminum siding paint to last 5-10 years, depending on weather conditions and maintenance.
What’s the best time of year to paint aluminum siding?
Spring or fall are ideal, as temperatures are moderate, avoiding extreme heat or cold that can affect paint drying and adhesion.
What happens if I use the wrong type of paint on aluminum siding?
Using incompatible paint can lead to peeling, cracking, and premature failure, requiring costly repainting. Always choose a paint specifically designed for aluminum.
How do I deal with mildew on my aluminum siding before painting?
Use a mildew-killing solution before cleaning and priming. Follow product instructions carefully.
Comments are closed.