Best Paint for Metal Barn Siding A Complete Guide
Best paint for metal barn siding? It’s more than just slapping on some color; it’s about protecting your investment for years to come. This guide walks you through choosing the right paint type (acrylic, alkyd, epoxy – we’ll cover the pros and cons of each!), prepping the surface (cleaning, rust removal are key!), selecting the perfect color to match your style, and applying it like a pro. We’ll even help you budget and maintain your stunning new paint job. Get ready to transform your barn!
We’ll delve into the specifics of each paint type, comparing durability, weather resistance, and application ease. Proper surface preparation is crucial, so we’ll cover cleaning methods, rust removal techniques, and the importance of priming. Choosing the right color is also a big part of the process, so we’ll explore color palettes and styles to help you achieve the perfect look for your barn. Finally, we’ll guide you through application techniques, essential tools, maintenance tips, and cost considerations to ensure a long-lasting and beautiful finish.
Types of Paint for Metal Barn Siding
Choosing the right paint for your metal barn siding is crucial for long-term protection and aesthetic appeal. The harsh elements—sun, rain, snow, and temperature fluctuations—demand a durable and weather-resistant coating. Several paint types offer varying levels of performance, each with its own set of advantages and disadvantages. Understanding these differences will help you make an informed decision.
Acrylic Paint for Metal Barn Siding
Acrylic paints are water-based, making them relatively easy to clean up with soap and water. They offer good adhesion to metal surfaces and are known for their flexibility, which helps them withstand expansion and contraction of the metal due to temperature changes. Acrylics are also generally low in VOCs (volatile organic compounds), making them a more environmentally friendly option. However, they may not be as durable as some other options, especially in extreme climates. They might require more frequent repainting compared to alkyd or epoxy paints. Application is typically straightforward using brushes, rollers, or sprayers.
Alkyd Paint for Metal Barn Siding
Alkyd paints, also known as oil-based paints, offer superior durability and weather resistance compared to acrylics. They form a tough, protective film that stands up well against harsh weather conditions and UV degradation. Alkyds are also known for their excellent hiding power, meaning fewer coats are often needed for complete coverage. However, alkyd paints have a strong odor during application and require solvents like mineral spirits for cleanup, which can be more inconvenient. They also take longer to dry than acrylics. Proper ventilation is essential during application.
Epoxy Paint for Metal Barn Siding
Epoxy paints are known for their exceptional hardness, durability, and chemical resistance. They create a very tough, protective barrier that is highly resistant to chipping, scratching, and corrosion. This makes them ideal for areas prone to heavy wear or exposure to harsh chemicals. However, epoxy paints are more expensive than acrylics or alkyds and require careful surface preparation for optimal adhesion. They also have a shorter pot life (working time) once mixed, so it’s crucial to only mix what you can apply within the recommended timeframe. Application usually involves a two-part mixing process.
Comparison of Paint Types for Metal Barn Siding
Understanding the differences in cost, longevity, and ease of application is key to making the right choice. The following table summarizes these factors:
| Paint Type | Cost | Longevity (Years) | Ease of Application |
|---|---|---|---|
| Acrylic | Low | 5-7 | Easy |
| Alkyd | Medium | 7-10 | Medium |
| Epoxy | High | 10+ | Difficult |
Surface Preparation for Painting
Source: craftingwithconcrete.com
Proper surface preparation is crucial for a long-lasting and attractive paint job on your metal barn siding. Neglecting this step can lead to premature paint failure, peeling, and rust, ultimately requiring more work and expense down the road. This section details the essential steps to ensure your siding is ready for painting.
Cleaning Metal Siding
Thorough cleaning removes dirt, grease, mildew, and loose paint, allowing the primer and paint to adhere properly. Two primary methods are commonly used: power washing and wire brushing. Power washing, using a pressure washer with a low-pressure nozzle (around 1500-2500 PSI), effectively blasts away loose debris. However, be cautious not to damage the metal siding with excessive pressure or too close a range. Always test in an inconspicuous area first. Wire brushing, either manually or with a power-driven brush, is ideal for removing stubborn dirt and loose rust in hard-to-reach areas. For large areas, power washing is more efficient, but wire brushing provides more precise control for detailed cleaning. Remember to wear appropriate safety gear, including eye protection and gloves, during both cleaning methods.
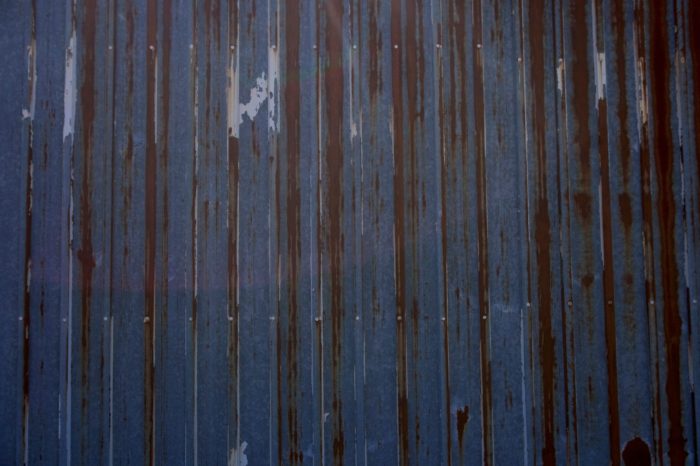
Rust Removal and Prevention
Rust is the enemy of any metal surface. It weakens the metal, compromises paint adhesion, and leads to unsightly blemishes. Rust removal should be a high priority. Methods range from wire brushing (as mentioned above) to chemical rust removers. Chemical removers are effective for larger areas or heavy rust accumulation but follow manufacturer’s instructions carefully and ensure adequate ventilation. After rust removal, apply a rust-inhibiting primer to prevent further rust formation. This primer creates a barrier between the bare metal and the subsequent paint layers, protecting the metal from moisture and oxygen, the main culprits in rust formation. Think of it as a protective shield for your metal siding.
Priming Metal Siding
Priming is a vital step that ensures paint adhesion and longevity. The right primer acts as a bonding agent between the metal surface and the topcoat paint. Choosing the correct primer depends on the type of metal and the existing condition. For rusty metal, a rust-inhibiting primer, as discussed above, is essential. For clean, bare metal, an oil-based or metal-specific primer provides excellent adhesion. For previously painted surfaces in good condition, a bonding primer might suffice. Always read the manufacturer’s instructions to ensure compatibility with your chosen topcoat paint.
- Clean the surface thoroughly: Remove all dirt, grease, and loose rust using the methods described earlier.
- Apply the primer evenly: Use a brush, roller, or sprayer, depending on the surface area and your preference. Ensure complete coverage, avoiding drips and runs.
- Allow sufficient drying time: Follow the manufacturer’s instructions regarding drying time before applying the topcoat paint. This usually takes several hours to overnight.
- Inspect for imperfections: Before applying the topcoat, inspect the primed surface for any missed spots or imperfections and address them accordingly.
Color Selection and Aesthetics
Choosing the right paint color for your metal barn siding is a crucial step that impacts its overall look and feel for years to come. The color you select should complement your barn’s style, the surrounding landscape, and your personal preferences, while also considering practical factors like the climate. A well-chosen color can enhance the barn’s curb appeal and even protect the metal from the elements.
Color selection involves careful consideration of several key factors. Climate plays a significant role; darker colors absorb more heat, which can be a problem in hot climates, potentially leading to increased interior temperatures. Lighter colors reflect sunlight, keeping the barn cooler. The surrounding environment should also be considered; a barn nestled in a lush green landscape might look better with earthy tones, while one situated against a rocky backdrop might suit bolder, more contrasting colors. Finally, your taste should be the ultimate deciding factor; after all, it’s your barn!
Color Palettes for Different Barn Styles
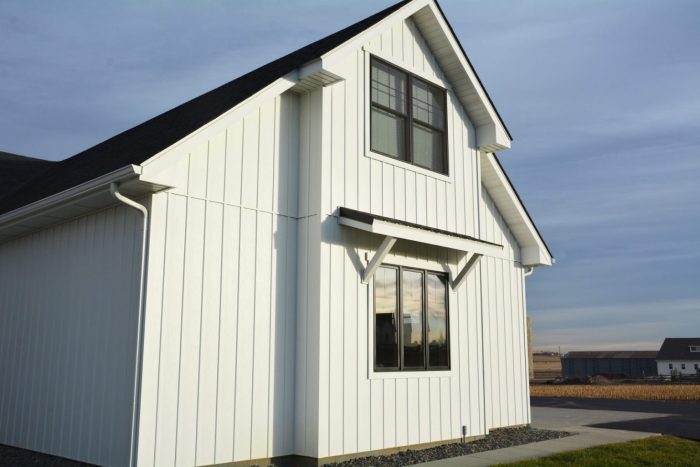
The following examples demonstrate how color choices can dramatically change the barn’s aesthetic. A rustic barn, for instance, might benefit from warm, earthy tones like deep reds, browns, or muted greens. Imagine a barn painted a rich, barn-red, accented with darker brown trim around the doors and windows. This creates a classic, timeless look. In contrast, a modern barn might suit sleek, contemporary colors like charcoal grey, navy blue, or even a sophisticated off-white. Picture a barn painted a clean, crisp white, with black accents highlighting the architectural details. This creates a sharp, clean contrast. A traditional barn might be painted in more muted tones, like a soft cream or a light grey, reflecting the historical styles of agricultural buildings. Think of a barn painted a creamy beige, with subtle green or blue accents that subtly blend with the surrounding landscape.
Visual Representation of Color Options
Let’s imagine three different barns side-by-side. The first barn, representing a rustic style, is painted a deep, reddish-brown, reminiscent of aged wood. The siding has subtle variations in tone, giving it a weathered, textured appearance. The second barn, showcasing a modern aesthetic, is painted a sleek, charcoal grey. The paint is smooth and even, highlighting the clean lines of the barn’s structure. Dark grey trim around the doors and windows adds a sophisticated touch. The third barn, embodying a traditional style, is painted a light, creamy off-white. This color provides a bright, airy feel, while subtle blue accents on the trim evoke a peaceful, countryside atmosphere.
Color Options Categorized by Style
Below is a summary of color options categorized by style, offering a quick guide for your decision-making process.
| Style | Color Palette | Description |
|---|---|---|
| Rustic | Deep reds, browns, muted greens, burnt oranges | Evokes a sense of warmth, age, and connection to nature. |
| Modern | Charcoal grey, navy blue, off-white, black | Creates a sleek, contemporary, and sophisticated look. |
| Traditional | Cream, light grey, soft blues, muted greens | Provides a classic, timeless appeal that blends seamlessly with various landscapes. |
Application Techniques and Tools
Painting your metal barn siding requires the right technique and tools for a professional-looking, long-lasting finish. The method you choose will impact both the quality of the paint job and the time it takes to complete the project. Let’s explore the different approaches and the tools you’ll need.
Methods of Paint Application
Choosing the right application method depends on several factors, including the size of your barn, the complexity of the siding, and your comfort level with different tools. Each method offers unique advantages and disadvantages. Brushing provides excellent control and coverage in hard-to-reach areas, but it can be labor-intensive. Rolling is faster for larger surfaces, but may require more coats for thorough coverage. Spraying offers the fastest application, ideal for large barns, but requires careful preparation to avoid overspray and runs.
Brush Application
Using brushes allows for precise application, particularly around corners, edges, and intricate details. High-quality brushes with durable bristles, such as those made from nylon or polyester, are essential. For metal siding, a brush with a slightly stiffer bristle is recommended to ensure good paint penetration. Apply paint in thin, even strokes, working in the direction of the grain (if applicable) to avoid brush marks. Overlapping strokes ensure complete coverage. Allow each coat to dry completely before applying the next.
Roller Application
Rollers are efficient for painting large, flat areas of metal siding. Choose a roller with a nap length appropriate for your paint type and surface texture. A shorter nap is suitable for smoother surfaces, while a longer nap can work better with textured surfaces. Load the roller evenly with paint, avoiding overloading to prevent drips and runs. Use a back-and-forth motion, overlapping each stroke to ensure even coverage. A paint tray and roller extension pole will significantly speed up the process and make reaching high areas easier.
Spray Application
Spraying provides the fastest application method, particularly beneficial for large barns. However, it requires more preparation and careful technique to avoid overspray and runs. Use a high-quality airless sprayer or HVLP (High Volume Low Pressure) sprayer. Ensure proper dilution of the paint according to the manufacturer’s instructions. Maintain a consistent distance from the surface and use a slow, even motion. Protect surrounding areas with drop cloths or plastic sheeting to prevent overspray.
Essential Tools and Materials Checklist
Proper preparation is key to a successful paint job. Having the right tools readily available will streamline the process.
- Metal siding cleaner and degreaser
- Wire brush or scraper to remove loose paint or rust
- Sandpaper (various grits) for smoothing surfaces
- Primer suitable for metal surfaces
- Metal paint (chosen based on the previous sections)
- Paint brushes (various sizes)
- Paint rollers and roller covers (various nap lengths)
- Paint tray and liner
- Extension pole for rollers
- Airless sprayer or HVLP sprayer (optional)
- Drop cloths or plastic sheeting
- Painter’s tape (for masking)
- Safety glasses and respirator
- Putty knife for filling imperfections
Maintenance and Longevity
Source: trulogsiding.com
Keeping your metal barn looking its best and extending the life of your paint job requires a proactive approach. Regular maintenance prevents small problems from becoming major headaches, saving you time, money, and frustration down the line. Understanding the factors that affect paint longevity is key to making informed decisions about care and repair.
Regular cleaning is the cornerstone of long-lasting paint. Dirt, debris, and pollutants can accumulate on the surface, dulling the color and potentially damaging the paint film over time. Pressure washing is an effective method for thorough cleaning, but be sure to use a low-pressure setting to avoid damaging the paint. A soft-bristled brush and mild detergent can also be used for more delicate cleaning. Regular inspections are also important to catch minor issues early on.
Factors Affecting Paint Longevity
Several environmental factors significantly influence how long your paint job will last. Exposure to ultraviolet (UV) rays from the sun is a major culprit, causing fading and chalking. Extreme temperature fluctuations, especially those involving freezing temperatures, can also lead to cracking and peeling. Moisture, from rain or snow, can contribute to rust formation underneath the paint if the metal wasn’t properly prepared before painting. The geographic location of your barn influences these factors; coastal areas experience higher salinity and more intense UV exposure than inland locations. For example, a barn in Florida will likely experience more rapid fading than one in Oregon due to the difference in sunlight intensity and humidity.
Addressing Common Paint Problems
Chipping, peeling, and fading are common paint problems that can be addressed with timely intervention. Chipping usually results from impact or abrasion. Small chips can be touched up with paint matching the original color. Larger areas of chipping may require more extensive repairs, possibly including scraping and priming before repainting. Peeling paint indicates adhesion problems, often caused by poor surface preparation before the initial painting or damage to the underlying metal. Peeling paint must be completely removed before repainting to ensure proper adhesion of the new coat. Fading, caused mainly by UV exposure, is more difficult to remedy completely. Repainting is the best solution, but selecting a paint with UV inhibitors can significantly extend the time between repainting cycles.
Extending the Life of the Paint Job
Several strategies can extend the lifespan of your barn’s paint job. Choosing high-quality paint specifically formulated for metal surfaces is crucial. These paints often contain UV inhibitors and rust inhibitors, providing better protection against environmental damage. Proper surface preparation, including cleaning, rust removal, and priming, is essential for good adhesion and long-lasting results. Regular cleaning and prompt attention to any signs of damage will prevent small problems from escalating into larger, more costly repairs. Consider adding a clear coat sealant over the paint for extra protection against UV rays and environmental elements. This additional layer can significantly increase the paint’s longevity and maintain the vibrancy of the color. Finally, scheduling regular repainting, even if it’s just touch-ups, will prevent the paint from deteriorating beyond repair.
Cost Considerations: Best Paint For Metal Barn Siding
Source: craftingwithconcrete.com
Painting a metal barn is a significant investment, and understanding the associated costs is crucial for budgeting and planning. Several factors influence the overall expense, including the type of paint chosen, the amount of surface area to be covered, the necessary preparation work, and whether you hire professional painters or tackle the project yourself. Careful planning can help you stay within your budget while ensuring a high-quality, long-lasting finish.
The total cost will vary greatly depending on your barn’s size, the condition of the existing siding, your choice of paint, and whether you opt for DIY or professional painting. Let’s break down the major cost components to give you a clearer picture.
Paint Costs, Best paint for metal barn siding
Paint represents a significant portion of the overall expense. The price per gallon varies considerably based on the type of paint. High-quality, specialized paints designed for metal, such as those with superior UV protection and rust inhibitors, will naturally be more expensive than standard exterior paints. Consider the total square footage of your barn’s siding to accurately estimate the number of gallons needed. Remember to account for extra paint for potential touch-ups or mistakes. For example, a high-quality acrylic-alkyd paint might cost $50-$80 per gallon, while a less expensive alternative could range from $20-$40 per gallon. The quantity needed will depend on the barn’s size and the number of coats required.
Materials Costs
Beyond paint, you’ll need various materials for surface preparation and application. This includes items like sandpaper, primer (if needed), cleaning solutions (like TSP), painter’s tape, drop cloths, brushes, rollers, and possibly a paint sprayer (and the associated cleaning supplies). The cost of these materials can range from $50 to $200 or more, depending on the size of the project and the tools you already own. If you’re renting a paint sprayer, add that rental cost to your materials budget.
Labor Costs
This is where the costs can escalate significantly. If you hire professional painters, their labor charges will be a major expense. The cost per hour or square foot varies regionally and depending on the painter’s experience and reputation. Expect to pay anywhere from $30 to $75 or more per hour for professional labor. A large barn could easily require several days of work, translating to a substantial labor cost. If you’re doing the painting yourself, your labor cost is essentially your time, but you should still factor in the value of your time.
Cost Breakdown Table
| Category | Low-Cost Estimate | Mid-Range Estimate | High-Cost Estimate |
|---|---|---|---|
| Materials (Paint, Primer, Supplies) | $150 | $300 | $500+ |
| Labor (DIY or Professional) | $0 (DIY) | $500 | $1500+ |
| Preparation (Cleaning, Repair) | $50 | $150 | $300+ |
| Total Estimated Cost | $200 | $950 | $2300+ |
Budget-Friendly Options
To keep costs down without sacrificing quality, consider these strategies: Thoroughly prepare the surface yourself to reduce labor costs. Opt for a more affordable paint that still offers adequate protection. Choose a simpler color scheme to minimize the amount of paint needed. Prioritize painting only the areas that are most visible or in need of repair, rather than the entire barn at once. Remember that thorough preparation is key to paint longevity, regardless of the paint type you choose; this minimizes the need for repainting in the future, ultimately saving money in the long run.
Conclusion
Source: rpsmetalroofing.com
Painting your metal barn siding is a worthwhile investment that significantly enhances its curb appeal and longevity. By carefully selecting the right paint, prepping the surface properly, and applying it with the correct techniques, you can achieve a professional-looking finish that will stand the test of time. Remember, regular maintenance and addressing any paint problems promptly will help extend the life of your paint job. So, gather your tools, choose your colors, and get ready to give your barn a fresh, protective coat!
FAQ Insights
What’s the average lifespan of paint on metal barn siding?
It depends on the paint type, climate, and maintenance, but you can expect anywhere from 5 to 15 years.
Can I paint over existing paint on my barn?
Yes, but ensure the old paint is sound and properly cleaned. If it’s peeling or damaged, you’ll need to remove it first.
How important is priming metal siding before painting?
Crucial! Primer provides a better surface for the paint to adhere to, preventing peeling and extending the paint’s life.
What’s the best time of year to paint a metal barn?
Ideally, when temperatures are moderate (between 50-85°F), and the weather is dry and sunny to allow for proper drying.
How do I deal with rust on my metal barn siding before painting?
Use a wire brush to remove loose rust, then apply a rust converter or primer designed for rust prevention.
Comments are closed.