Best Paint for Aluminum Siding A Complete Guide
Best paint for aluminium siding – Best paint for aluminum siding? It’s more than just slapping on some color; it’s about protecting your investment and boosting curb appeal. This guide dives into the nitty-gritty, from choosing the right paint type (acrylic latex, alkyd, or epoxy—we’ll compare them all!) to mastering the application process and keeping your siding looking fresh for years. We’ll cover surface prep, color selection, maintenance, and even the environmental impact. Get ready to become a siding-painting pro!
Choosing the right paint is crucial for a long-lasting, beautiful finish. We’ll break down the properties of different paints, highlighting their strengths and weaknesses when it comes to adhesion, durability, UV resistance, and more. Proper surface preparation is equally important – we’ll walk you through cleaning, repairing, and priming your aluminum siding to ensure optimal paint adherence. Finally, we’ll cover application techniques, color selection, and long-term maintenance to keep your siding looking its best.
Types of Paint Suitable for Aluminum Siding
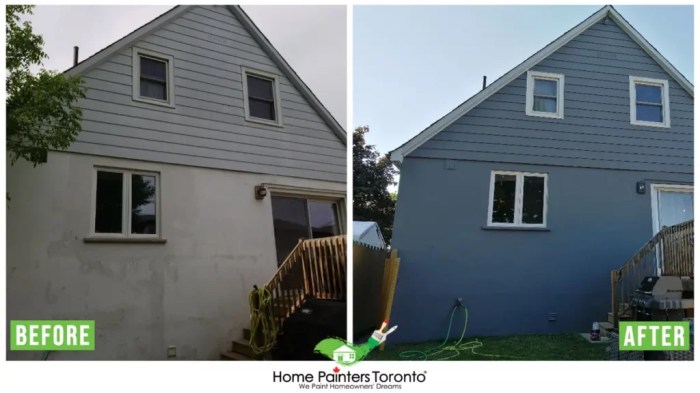
Source: homepainterstoronto.com
Choosing the right paint for your aluminum siding is crucial for long-lasting protection and a beautiful finish. Aluminum siding, while durable, requires a paint that can adhere properly and withstand the elements. Several paint types offer suitable properties, each with its advantages and disadvantages. Let’s explore the best options.
Acrylic Latex Paints for Aluminum Siding, Best paint for aluminum siding
Acrylic latex paints are a popular choice for exterior applications, including aluminum siding. They offer excellent adhesion, flexibility, and are relatively easy to apply. Their water-based formula makes them low-odor and easy to clean up. However, their durability and UV resistance can be less than some other options, potentially requiring more frequent repainting. The flexibility is important for aluminum siding as it expands and contracts with temperature changes. A high-quality acrylic latex paint with added UV inhibitors will improve its lifespan considerably.
Acrylic Alkyd Paints for Aluminum Siding
Acrylic alkyd paints combine the benefits of both acrylic and alkyd resins. They offer superior durability and UV resistance compared to pure acrylic latex paints. The alkyd component provides a harder, more durable finish that better resists chipping and fading. They are also more water-resistant than latex paints, making them a good choice for areas with frequent rainfall. However, acrylic alkyd paints typically have a stronger odor during application and require solvents for cleanup. Their flexibility is generally good, but may not be as good as some pure acrylic formulations.
Epoxy Paints for Aluminum Siding
Epoxy paints are known for their exceptional durability and adhesion. They form a very hard, protective layer that is highly resistant to chipping, scratching, and fading. Their excellent UV resistance makes them a long-lasting option, even in harsh climates. However, epoxy paints are typically more expensive than latex or acrylic alkyd paints and can be more challenging to apply. They often require a specialized primer and may be less flexible than other options, making them potentially more prone to cracking with significant temperature fluctuations. Proper surface preparation is essential for successful application.
Comparison of Paint Types for Aluminum Siding
The following table summarizes the key differences between the three paint types:
| Paint Type | Lifespan (Years) | Cost (Relative) | Application Method |
|---|---|---|---|
| Acrylic Latex | 5-7 | Low | Brush, Roller, Spray |
| Acrylic Alkyd | 7-10 | Medium | Brush, Roller, Spray |
| Epoxy | 10-15+ | High | Brush, Roller (Spray less common) |
Surface Preparation for Painting Aluminum Siding
Proper surface preparation is crucial for a long-lasting and attractive paint job on your aluminum siding. Neglecting this step can lead to peeling, chipping, and an overall unsatisfactory finish. A clean and properly repaired surface ensures the paint adheres effectively, maximizing its lifespan and enhancing the aesthetic appeal of your home.
Cleaning aluminum siding before painting removes dirt, grime, mildew, and other contaminants that can interfere with paint adhesion. These contaminants can create a barrier between the paint and the siding, leading to premature paint failure. Thorough cleaning also allows you to properly assess the condition of the siding and identify areas requiring repair.
Aluminum Siding Cleaning Process
Cleaning aluminum siding involves a systematic approach using appropriate cleaning agents and tools. Begin by rinsing the siding with a garden hose to remove loose dirt and debris. For heavily soiled areas, a solution of mild detergent and water can be used. Apply the solution using a soft-bristled brush or a long-handled scrub brush, working in sections to avoid missing any areas. After scrubbing, rinse thoroughly with clean water, ensuring all traces of detergent are removed. For stubborn mildew or algae, a solution of trisodium phosphate (TSP) and water may be necessary, but always follow the manufacturer’s instructions and wear appropriate protective gear, including gloves and eye protection. Allow the siding to dry completely before proceeding to the next step.
Surface Repair Techniques
Before painting, carefully inspect the aluminum siding for any damage, such as cracks, holes, or dents. Small cracks can often be filled using an aluminum-compatible caulk. Apply the caulk smoothly and allow it to cure completely according to the manufacturer’s instructions. For larger holes or significant damage, patching may be necessary. Aluminum patching material or specialized repair kits designed for aluminum siding are available from most hardware stores. Follow the instructions provided with the patching material to ensure a proper and durable repair. Once repairs are complete, allow sufficient time for them to cure completely before proceeding with priming and painting.
Step-by-Step Surface Preparation Guide
A well-defined process ensures a successful paint job. Here’s a step-by-step guide to prepare your aluminum siding for painting:
- Clean the siding: Rinse with a garden hose, then scrub with a detergent solution (or TSP for mildew) and rinse thoroughly. Allow to dry completely.
- Inspect for damage: Carefully examine the siding for cracks, holes, or other damage.
- Repair damaged areas: Fill small cracks with aluminum-compatible caulk or patch larger holes using appropriate materials. Allow repairs to cure completely.
- Prime the siding: Apply a high-quality primer specifically formulated for aluminum siding. This primer will improve paint adhesion and provide a uniform base for the topcoat.
- Allow primer to dry: Ensure the primer is completely dry before applying the paint, following the manufacturer’s drying time recommendations.
Remember to always wear appropriate safety gear, including gloves and eye protection, when working with cleaning solutions and repair materials.
Application Techniques and Tools
Painting aluminum siding successfully hinges on choosing the right application method and using the appropriate tools. The weather plays a significant role, so careful planning is essential for a professional-looking and long-lasting finish. Let’s explore the best techniques and equipment for the job.
Weather Conditions and Best Practices
Ideal painting conditions are crucial. Avoid painting in direct sunlight, as the paint will dry too quickly, leading to uneven coverage and brush strokes. High humidity can also slow down drying time and potentially trap moisture under the paint, causing peeling. Aim for a mild, dry day with temperatures between 50°F and 80°F (10°C and 27°C). Light breezes are acceptable, but strong winds can blow dust and debris onto the wet paint. Always check the weather forecast before starting your project. It’s also wise to avoid painting when rain is expected within 24 hours.
Application Methods
Three main methods exist for applying paint to aluminum siding: brushing, rolling, and spraying. Each has its advantages and disadvantages.
- Brushing: Best for detailed areas, trim, and hard-to-reach spots. Offers excellent control, allowing you to work precisely around windows, doors, and other features. However, it’s the most labor-intensive method and can be slower for large areas.
- Rolling: A good balance between speed and control. Suitable for large, flat surfaces, providing efficient coverage. However, it might not reach all crevices as effectively as brushing.
- Spraying: The fastest method for covering large areas. Provides a smooth, even finish. However, it requires more specialized equipment and careful preparation to avoid overspray and runs. It’s also crucial to protect surrounding areas from overspray.
Necessary Tools and Equipment
The tools required vary depending on the chosen application method.
Tools for Brushing
- High-quality brushes with synthetic bristles designed for exterior paints.
- Paint tray.
- Drop cloths or plastic sheeting to protect surrounding areas.
- Putty knife for scraping loose paint or debris.
Tools for Rolling
- A roller frame with a high-quality nap roller cover (choose a nap length appropriate for the siding texture). A thicker nap is better for textured surfaces.
- Paint tray or roller pan.
- Extension pole (for reaching higher areas).
- Drop cloths or plastic sheeting.
- Putty knife.
Tools for Spraying
- An airless sprayer (HVLP sprayers are also an option, but airless sprayers are generally preferred for exterior painting due to their efficiency).
- Appropriate paint tips for aluminum siding.
- Protective gear: respirator mask, safety glasses, and gloves.
- Drop cloths or plastic sheeting (to protect a much wider area than with brushing or rolling).
- Putty knife.
Roller Application Technique
Imagine a section of aluminum siding. Load your roller with paint, ensuring it’s well-saturated but not dripping. Begin applying the paint in a smooth, even “W” pattern, overlapping each stroke by about 50%. This ensures complete coverage and prevents streaks. Work in small sections (approximately 3-4 feet square), completing each section before moving on. Avoid heavy pressure; let the roller do the work. Once the “W” pattern is complete, lightly roll over the section in a vertical or horizontal direction to create an even finish. Allow each section to dry before moving on to the next. This method minimizes lap marks and ensures a consistent, professional appearance. The “W” pattern creates a base coat that’s then smoothed out to prevent visible streaks. The overlapping strokes are key to preventing gaps in coverage.
Color Selection and Considerations
Choosing the right color for your aluminum siding is crucial, impacting both the aesthetic appeal and the longevity of your paint job. The color you select significantly affects how your home looks and feels, and even influences its energy efficiency. Careful consideration of several factors will ensure a beautiful and practical result.
Color choice directly influences how much heat your home absorbs and reflects. Lighter colors, like whites and pastels, reflect more sunlight and heat, keeping your home cooler in the summer and potentially lowering your energy bills. Conversely, darker colors absorb more heat, which can be beneficial in colder climates but may increase cooling costs in warmer regions. This effect is particularly noticeable with aluminum siding, which can become quite hot in direct sunlight.
Color and Heat Reflection
Different colors possess varying abilities to reflect or absorb solar radiation. A white surface, for example, reflects nearly all visible light, while a black surface absorbs almost all of it. This difference translates directly into the amount of heat transferred to your home’s exterior. The higher the reflectivity (often measured as solar reflectance), the lower the heat absorption. For example, a house painted a light grey might experience a noticeable reduction in internal temperature compared to one painted dark brown, particularly in sunny climates. This is a significant consideration when aiming for energy efficiency.
Factors Influencing Color Choice
Several factors should guide your color selection beyond simply personal preference. The architectural style of your house is paramount; a Victorian home might suit warmer, earthier tones, while a modern home might look better with cool, neutral shades. The surrounding environment also plays a role. A home nestled amongst lush greenery might look stunning with a vibrant color, while a home in a more subdued neighborhood might benefit from a more muted palette. Finally, consider the long-term maintenance implications. Darker colors tend to show dirt and grime more readily than lighter colors.
Suitable Color Palettes for Aluminum Siding
Choosing a color palette involves considering both the individual colors and how they work together. Here are a few examples:
Before presenting specific palettes, it’s important to understand that color perception is subjective and influenced by factors like lighting and personal taste. These suggestions offer a starting point for your exploration.
- Neutral and Earthy Tones: This palette uses muted greens, greys, and browns, creating a classic and timeless look that complements various architectural styles. Examples include sage green, charcoal grey, and taupe. This option provides a versatile backdrop for landscaping and other exterior features.
- Cool and Modern: This palette incorporates blues, greys, and whites, projecting a clean, contemporary aesthetic. Think light blues, silver greys, and crisp whites. This choice is particularly suitable for modern homes and offers a calming, refreshing feel.
- Warm and Inviting: This palette uses warmer shades like creams, beiges, and soft yellows, creating a welcoming and inviting atmosphere. Consider off-white, warm beige, and a light golden yellow. This approach can create a sense of coziness and sophistication.
Maintenance and Longevity

Source: sheldonandsons.com
Proper maintenance is key to extending the lifespan of your freshly painted aluminum siding. A well-maintained paint job can last for many years, protecting your home and enhancing its curb appeal. Neglecting maintenance, however, can lead to premature deterioration and costly repairs. This section includes essential maintenance practices to keep your aluminum siding looking its best.
Regular cleaning and occasional touch-ups are crucial for preserving the integrity of the paint. Ignoring minor damage can quickly escalate into larger, more expensive problems. By proactively addressing issues, you can significantly extend the life of your paint job and avoid the need for complete repainting.
Cleaning and Protection
Regular cleaning removes dirt, debris, and mildew that can damage the paint and shorten its lifespan. A gentle solution of mild detergent and water, applied with a soft-bristled brush or sponge, is usually sufficient. Avoid using abrasive cleaners or high-pressure washers, as these can damage the paint surface. For tougher stains, a solution of bleach and water (always follow the manufacturer’s instructions) may be necessary, but be sure to rinse thoroughly afterward. Consider using a garden hose with a low-pressure nozzle to rinse the siding. After cleaning, allow the siding to air dry completely before applying any protective coatings. Applying a high-quality sealant or UV protectant every few years can also help to protect the paint from the elements and prolong its life. This is especially important in areas with harsh weather conditions.
Addressing Common Issues
Chipping, peeling, and fading are common problems that can affect painted aluminum siding. Chipping is often caused by impact damage, such as from flying debris or hail. Peeling usually indicates poor surface preparation before painting or the use of an inappropriate paint type. Fading is typically caused by prolonged exposure to sunlight and UV radiation. To address chipping, carefully scrape away loose paint, clean the area, and apply a touch-up coat of paint that matches the original color. For peeling, the affected area may need to be more extensively scraped and cleaned before repainting. If the peeling is widespread, it might be more cost-effective to repaint the entire section or even the whole house. Fading can be minimized by using a high-quality paint with UV protection. Regular cleaning and the application of a UV protectant can also help to prevent fading.
Maintenance Schedule
A regular maintenance schedule will help to ensure your painted aluminum siding remains in excellent condition for years to come.
- Annual Inspection: Perform a thorough visual inspection of your siding at least once a year, looking for any signs of damage, such as chipping, peeling, or fading. Pay close attention to areas that are most exposed to the elements.
- Spring Cleaning: Clean your siding in the spring to remove any dirt, debris, and mildew that accumulated over the winter. This will help to prevent damage to the paint and maintain its appearance.
- Touch-ups as Needed: Address any minor damage, such as chipping or peeling, as soon as possible to prevent it from worsening. Keep a small amount of touch-up paint on hand to make repairs quickly and efficiently.
- Two-Year Protective Coating Application: Apply a high-quality sealant or UV protectant every two years to protect the paint from the elements and prolong its life. This is especially important in areas with harsh weather conditions. This can be increased to annually in areas with particularly harsh weather conditions.
By following this maintenance schedule and addressing any issues promptly, you can significantly extend the life of your paint job and keep your aluminum siding looking its best for years to come.
Environmental Impact and Safety

Source: homepainterstoronto.com
Painting aluminum siding, while enhancing your home’s curb appeal, carries environmental and health considerations. Choosing the right paint and following safe practices minimizes these impacts, ensuring a project that benefits both your home and the planet. Let’s explore these important aspects.
Environmental Impact of Different Paint Types
The environmental impact of paint primarily stems from its volatile organic compounds (VOCs), which contribute to air pollution and smog. Oil-based paints generally have higher VOC content than water-based (latex) paints. Disposal also plays a role; discarding paint improperly can contaminate soil and water sources. Oil-based paints, due to their slower drying time and potentially hazardous components, require more careful disposal than water-based paints. Many communities offer hazardous waste collection days specifically for paint disposal.
Health Hazards Associated with Paint Application
Paint fumes, particularly from oil-based paints, can cause respiratory irritation, headaches, and dizziness. Skin contact can lead to irritation or allergic reactions. Certain paint pigments may also pose health risks. Lead-based paints, though largely banned, still exist in older homes and present significant health hazards if disturbed. Always test for lead paint before beginning any project. Ingestion of paint chips is especially dangerous for children.
Low-VOC and Eco-Friendly Paint Options
Fortunately, many low-VOC and eco-friendly paint options are available. These paints use water-based formulations and often incorporate recycled materials or plant-based binders, significantly reducing their environmental footprint. Look for paints certified by organizations like Green Seal or similar certifications that verify their reduced environmental impact. These paints generally perform as well as conventional paints, offering comparable durability and coverage. For example, some brands boast a VOC content of less than 5 grams per liter, significantly lower than traditional oil-based paints which can exceed 250 grams per liter.
Safety Precautions for Painting Aluminum Siding
Proper safety precautions are crucial during the painting process. This involves wearing appropriate personal protective equipment (PPE) and following safe handling procedures for paints and solvents.
- Always wear a respirator or dust mask to avoid inhaling paint fumes.
- Protect your eyes with safety glasses.
- Wear gloves to prevent skin contact with paint and solvents.
- Work in a well-ventilated area or use a respirator with appropriate cartridges.
- Properly dispose of paint containers and waste materials according to local regulations.
- Keep children and pets away from the work area.
- Follow the manufacturer’s instructions on the paint label carefully.
- Never mix different types of paints or solvents unless explicitly instructed to do so.
Concluding Remarks: Best Paint For Aluminium Siding
Painting aluminum siding successfully combines careful planning with skillful execution. By selecting the appropriate paint type, meticulously preparing the surface, employing the correct application techniques, and implementing a regular maintenance schedule, you can achieve a stunning and durable finish. Remember, the key is to choose a high-quality paint, invest time in preparation, and follow best practices for application. With a little effort, your aluminum siding will look fantastic for years to come – and you’ll have the satisfaction of knowing you did it yourself!
FAQ Insights
Can I paint aluminum siding in cold weather?
Generally, no. Most paints require temperatures above 50°F (10°C) for proper adhesion and drying. Cold temperatures can significantly hinder the curing process, leading to a subpar finish.
How long does aluminum siding paint last?
The lifespan depends on the paint type, preparation, and weather conditions. High-quality paints can last 5-10 years or more, while cheaper options may only last a few years.
What’s the best way to clean aluminum siding before painting?
Use a pressure washer (low pressure setting) to remove dirt and debris. Follow up with a solution of mild detergent and water, scrubbing with a soft brush if needed. Rinse thoroughly and allow to dry completely.
Do I need to prime aluminum siding before painting?
While not always strictly necessary with certain paints, priming is generally recommended, especially for bare aluminum or if you’re changing colors drastically. Primer improves adhesion and provides a more even finish.
Can I use a spray painter for aluminum siding?
Yes, a sprayer can be efficient, but requires careful technique to avoid runs and drips. Practice on a less visible area first. Always follow the manufacturer’s instructions for your paint and sprayer.
Comments are closed.