Best Paint to Paint Aluminum Siding
Best paint to paint aluminum siding? It’s a question many homeowners grapple with. Choosing the right paint isn’t just about aesthetics; it’s about protecting your investment and ensuring your siding looks great for years to come. This guide will walk you through selecting the perfect paint type, prepping your surface, applying it correctly, and maintaining that fresh look. We’ll cover everything from acrylics to alkyds, and from brushes to sprayers, helping you achieve professional-looking results.
This guide covers the essential steps for painting aluminum siding, including selecting the right paint type, prepping the surface, applying the paint, and maintaining the finished product. We’ll explore different application methods and techniques to help you achieve a smooth, even finish that lasts. We’ll also discuss choosing the right color and sheen to complement your home’s style and enhance its curb appeal.
Types of Paint Suitable for Aluminum Siding
Choosing the right paint for your aluminum siding is crucial for a long-lasting, attractive finish. The wrong paint can lead to peeling, chipping, and premature fading, requiring costly repainting sooner than expected. Understanding the properties of different paint types will help you make an informed decision.
Paint Types and Their Properties
Selecting the appropriate paint depends on several factors, including the existing condition of the siding, the climate, and your budget. The table below summarizes the common types of paint used for aluminum siding, highlighting their key characteristics.
| Paint Type | Durability | Finish | Application Method |
|---|---|---|---|
| Acrylic Latex | Good; flexible and resists cracking | Various (satin, semi-gloss, gloss) | Brush, roller, sprayer |
| Acrylic-Alkyd (Hybrid) | Excellent; combines durability of alkyd with ease of cleanup of acrylic | Various (satin, semi-gloss, gloss) | Brush, roller, sprayer |
| Alkyd (Oil-Based) | Very good; hard, durable finish, excellent adhesion | Various (satin, semi-gloss, gloss) | Brush, roller, sprayer |
| Epoxy | Excellent; extremely durable and weather-resistant | Typically gloss | Brush, roller, sprayer |
Advantages and Disadvantages of Each Paint Type
Each paint type offers unique advantages and disadvantages. Acrylic latex paints are popular due to their ease of application and cleanup, using water as a solvent. However, they may not be as durable as alkyd or epoxy paints in harsh weather conditions. Alkyd paints provide a tougher, more durable finish but require mineral spirits for cleanup, which can be more inconvenient. Epoxy paints offer superior durability and weather resistance but often come with a higher price tag and may require more specialized application techniques. Hybrid acrylic-alkyd paints attempt to balance the best qualities of both acrylic and alkyd paints.
Longevity and Weather Resistance
The longevity and weather resistance of different paint types vary significantly. Epoxy paints generally offer the longest lifespan, often lasting for 10-15 years or more depending on the climate and surface preparation. Alkyd paints typically last 7-10 years, while acrylic latex paints might only last 5-7 years under similar conditions. However, proper surface preparation, such as cleaning and priming, significantly impacts the longevity of any paint regardless of the type. For example, a properly prepared surface painted with a high-quality acrylic latex paint in a mild climate could potentially last longer than a poorly prepared surface painted with an epoxy paint in a harsh, coastal environment.
Surface Preparation for Painting Aluminum Siding
Proper surface preparation is crucial for a long-lasting and attractive paint job on your aluminum siding. Failing to adequately prepare the surface will result in poor paint adhesion, leading to peeling, chipping, and an overall unsatisfactory finish. This section details the necessary steps to ensure your paint adheres properly and provides years of protection.
Thorough cleaning is the foundation of successful aluminum siding painting. Dirt, grime, mildew, and old paint residue prevent the new paint from bonding correctly. A clean surface maximizes the paint’s ability to adhere, resulting in a durable and even finish.
Cleaning the Aluminum Siding
Cleaning the aluminum siding involves several steps to remove all contaminants. The method you choose depends on the level of dirt and grime present. A thorough cleaning will significantly improve paint adhesion and the longevity of your paint job.
- Rinse: Begin by rinsing the siding with a garden hose to remove loose dirt and debris. Focus on areas with heavy buildup.
- Wash: Mix a solution of mild detergent (like dish soap) and water. Use a soft-bristled brush or sponge to scrub the siding, paying attention to areas with mildew or staining. Avoid abrasive cleaners or scrub brushes that could scratch the aluminum.
- Rinse Again: Thoroughly rinse the siding with clean water to remove all traces of soap and dirt. Ensure all surfaces are completely clean and free from residue.
- Allow to Dry: Allow the siding to dry completely before proceeding to the next step. This usually takes several hours, depending on weather conditions. A completely dry surface is essential for proper primer adhesion.
Repairing Damaged Areas
Before painting, address any imperfections on the aluminum siding. Repairing dents, scratches, and other damage will ensure a smooth, even finish. Ignoring these imperfections will result in an uneven paint job and potentially lead to faster paint degradation.
- Inspect: Carefully inspect the entire surface for dents, scratches, holes, or other damage. Note the extent and location of each imperfection.
- Fill Dents: For minor dents, carefully use an aluminum-specific filler to smooth out the surface. Allow the filler to dry completely according to the manufacturer’s instructions before sanding.
- Repair Scratches: For scratches, consider using a touch-up paint that closely matches the existing siding color. Alternatively, you can use an aluminum repair filler to fill deeper scratches and then sand smooth.
- Caulk Holes: Fill any holes or gaps with a high-quality exterior-grade caulk, ensuring it is compatible with aluminum and paint. Allow the caulk to cure completely before sanding.
- Sanding: After filling and caulking, lightly sand the repaired areas with fine-grit sandpaper (around 220-grit) to create a smooth, even surface. Remove any dust with a tack cloth.
Priming the Aluminum Siding
Priming is a crucial step in preparing aluminum siding for painting. A quality primer enhances paint adhesion, improves the paint’s durability, and provides a uniform base for the topcoat. Choose a primer specifically designed for aluminum or metal surfaces.
- Choose Primer: Select a high-quality primer formulated for exterior use and specifically designed for adhesion to aluminum. This will ensure optimal bonding between the primer and the aluminum siding.
- Apply Primer: Apply the primer evenly using a roller or brush, following the manufacturer’s instructions. Ensure complete coverage, especially in repaired areas. Apply thin, even coats to avoid runs and drips.
- Allow to Dry: Allow the primer to dry completely before applying the topcoat. This drying time varies depending on the primer and weather conditions; refer to the product label for specific instructions.
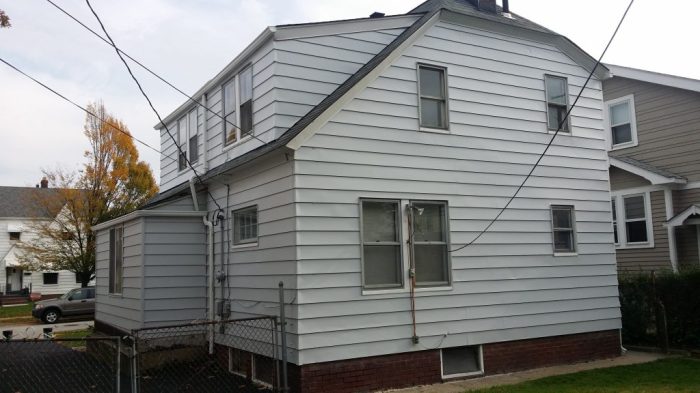
Visual Guide to Surface Preparation, Best paint to paint aluminum siding
Imagine the aluminum siding. First, you’d thoroughly rinse it with a hose, visualizing water washing away loose dirt. Next, you’d scrub the surface with a soapy solution using a soft brush, picturing the grime lifting away. A thorough rinsing follows, leaving the siding clean and gleaming. After drying, you’d inspect for damage. You would see dents carefully filled with aluminum filler, scratches gently touched up with matching paint, and holes sealed with caulk. After allowing the repairs to dry, you’d lightly sand the filled areas until smooth, removing any excess material or dust. Finally, you would apply an even coat of aluminum primer, ensuring complete coverage. The primer would provide a uniform, smooth surface ready for the final coat of paint.
Application Methods and Techniques
Painting aluminum siding requires careful consideration of the application method to ensure a durable and even finish. The choice depends on factors like the size of the area, your experience level, and the desired level of finish. Each method offers unique advantages and disadvantages.
Aluminum Siding Painting Methods Comparison
Choosing the right application method is crucial for a professional-looking finish. Here’s a comparison of common methods:
| Application Method | Advantages | Disadvantages | Suitable For |
|---|---|---|---|
| Brush | Excellent control, good for detail work, environmentally friendly (no spray equipment needed). | Labor-intensive, can leave brush strokes if not applied carefully, slower coverage than other methods. | Small areas, intricate details, touch-ups. |
| Roller | Faster coverage than brushing, relatively easy to use, good for larger, flat surfaces. | Can leave roller marks if not applied smoothly, may not reach all crevices and corners effectively. | Large, flat areas of siding. |
| Sprayer (Airless or HVLP) | Fastest coverage, provides a very even finish, ideal for large areas. | Requires specialized equipment, potential for overspray, more cleanup involved, needs careful preparation to avoid runs and drips. | Large siding projects, achieving a uniform finish. |
Achieving a Smooth Finish with Different Application Methods
Regardless of the chosen method, preparation is key to a smooth finish. Always ensure the surface is clean, dry, and properly primed.
For brushing, use smooth, even strokes, overlapping each stroke slightly to avoid streaks. For rolling, use a high-quality roller with a nap suitable for the siding texture. Apply even pressure and avoid overloading the roller. For spraying, maintaining a consistent distance and even application rate is crucial.
Step-by-Step Guide: Using a Paint Sprayer
Using a paint sprayer can yield professional results, but requires careful execution. Here’s a step-by-step guide:
- Preparation: Thoroughly clean and prepare the aluminum siding as previously discussed. Mask off areas you don’t want painted (windows, trim, etc.). Protect surrounding areas with drop cloths.
- Thinning the Paint: Thin the paint according to the manufacturer’s instructions. Using the correct viscosity is crucial for preventing clogging and ensuring a smooth finish.
- Testing: Test the sprayer on a scrap piece of aluminum siding to check the spray pattern and adjust the settings as needed. This helps avoid mistakes on the actual siding.
- Application: Hold the sprayer approximately 12-18 inches from the surface. Maintain a consistent distance and speed, overlapping each pass slightly. Avoid long, continuous strokes to prevent runs and drips. Work in manageable sections.
- Multiple Coats: Apply multiple thin coats, allowing each coat to dry completely before applying the next. This ensures better coverage and a more durable finish.
- Cleanup: Thoroughly clean the sprayer immediately after use according to the manufacturer’s instructions. This prevents paint from drying and clogging the equipment.
Choosing the Right Color and Sheen: Best Paint To Paint Aluminum Siding
Source: thepickypainters.com
Picking the perfect paint color and sheen for your aluminum siding is a crucial step in achieving a beautiful and long-lasting finish. The choices you make will significantly impact your home’s curb appeal and the overall longevity of the paint job. Consider both aesthetic and practical factors to make an informed decision.
Color selection involves balancing personal preference with the architectural style of your home and its surroundings. A color that looks stunning on a Victorian house might clash terribly with a modern ranch. Similarly, the colors of your landscape, neighboring houses, and even the overall tone of your neighborhood should influence your decision.
Color Selection Factors
Choosing the right color is about more than just personal taste. It’s about creating a harmonious look that complements your home and its environment. Consider the architectural style of your house; a bold color might suit a contemporary design, while a more muted shade might be better for a traditional home. The surrounding landscape also plays a role; earth tones often blend well with natural surroundings, while brighter colors can stand out. Finally, consider the overall feel you want to create—a welcoming, sophisticated, or playful atmosphere. Don’t forget to check local building codes or homeowner association rules regarding exterior paint colors.
Sheen Options and Their Impact
The sheen of your paint refers to its level of glossiness. This impacts both the look and the durability of the paint. Different sheens offer various advantages and disadvantages.
Visual Representation of Sheen Levels
Imagine three samples of aluminum siding painted with the same color but different sheens. The first, painted with a matte finish, would have a completely flat, non-reflective surface. It would appear almost velvety to the touch and would minimize the appearance of imperfections in the siding. The second, painted with a satin finish, would possess a subtle, low-level sheen. It would have a slightly more reflective surface than the matte, but still appear relatively understated. The third, painted with a gloss finish, would have a high-gloss, highly reflective surface. It would be noticeably shiny and would highlight any imperfections on the siding.
Light and Dark Color Comparison
Light colors reflect more sunlight, reducing heat absorption and keeping your home cooler, potentially lowering energy costs. Dark colors, conversely, absorb more heat, leading to increased energy consumption for air conditioning. However, dark colors can create a more dramatic and sophisticated look. For example, a light gray might reflect heat well but lack the visual impact of a deep navy blue. The climate you live in should significantly influence your choice; in hot climates, lighter colors are often preferred for their heat-reflective properties.
Maintenance and Longevity of Painted Aluminum Siding

Source: storables.com
Proper maintenance significantly extends the life of your painted aluminum siding, protecting your investment and maintaining your home’s curb appeal. Regular care prevents damage from accumulating and keeps your siding looking its best for years to come. Neglecting maintenance can lead to premature deterioration and costly repairs.
Maintaining Painted Aluminum Siding
Regular cleaning and occasional touch-ups are key to prolonging the life of your painted aluminum siding. Consistent maintenance minimizes the impact of harsh weather and prevents problems from escalating. The following steps will help keep your siding in top condition.
- Regular Cleaning: Wash your siding at least once or twice a year, preferably in spring and fall, using a soft-bristled brush, a garden hose, and a mild detergent solution. Avoid harsh chemicals or abrasive cleaners that can damage the paint. Rinse thoroughly to remove all soap residue.
- Inspect for Damage: During cleaning, carefully inspect the siding for any signs of damage such as peeling paint, chipping, scratches, or dents. Address minor issues promptly to prevent them from worsening.
- Repair Minor Damage: Small chips or scratches can be easily repaired using touch-up paint that matches your siding’s color. For larger areas of damage, consider professional repainting.
- Trim Overhanging Branches: Keep tree branches and shrubs trimmed back from your siding to prevent scratching and damage from falling debris.
- Prevent Moisture Buildup: Ensure proper ventilation around your home to prevent moisture buildup, which can lead to mold and mildew growth under the paint.
Lifespan of Paint on Aluminum Siding
The lifespan of paint on aluminum siding varies greatly depending on several factors, including the quality of the paint, the preparation of the surface before painting, and the climate. In general, high-quality acrylic latex paints can last 10-15 years in moderate climates, while in harsh climates with extreme temperature fluctuations and prolonged sun exposure, the lifespan may be reduced to 5-10 years. Alkyd paints, known for their durability, may offer a slightly longer lifespan in favorable conditions. For example, a home in a dry, sunny climate might see a longer lifespan than one in a humid, coastal region.
Addressing Common Issues
Peeling, chipping, and fading are common problems that can affect painted aluminum siding. Early detection and prompt action are crucial to prevent further damage.
- Peeling Paint: Peeling paint often indicates poor surface preparation before painting or the use of an unsuitable paint type. Repair involves removing the loose paint, cleaning the surface, and applying a primer and fresh coat of paint.
- Chipping Paint: Chipping usually results from impact damage. Repair involves cleaning the chipped area, applying a primer, and using touch-up paint to match the existing color.
- Fading Paint: Fading is caused by prolonged sun exposure. While you can’t prevent fading entirely, using a high-quality paint with UV protection can help extend the color’s lifespan. Repainting is the ultimate solution for significantly faded siding.
Preventative Maintenance Schedule
A proactive approach to maintenance can significantly extend the life of your painted aluminum siding. The following schedule, Articles recommended cleaning and repainting intervals:
| Task | Frequency |
|---|---|
| Cleaning | Twice yearly (Spring and Fall) |
| Inspection for Damage | During each cleaning |
| Minor Repairs | As needed |
| Repainting (Entire House) | Every 10-15 years (depending on climate and paint quality) |
Final Wrap-Up
Source: etpainting.com
Painting aluminum siding successfully requires careful planning and execution. From selecting the appropriate paint and prepping the surface to applying the paint correctly and maintaining the finished product, each step plays a crucial role in achieving a long-lasting and aesthetically pleasing result. By following the guidelines and tips provided in this guide, you can confidently tackle this project and enjoy the enhanced beauty and protection of your freshly painted aluminum siding for many years to come. Remember, proper preparation is key to a professional finish and extended lifespan. So grab your brushes (or sprayer!), and let’s get started!
FAQ Explained
Can I paint aluminum siding in the winter?
It’s generally recommended to avoid painting in freezing temperatures or when rain is expected. Ideal temperatures are usually above 50°F (10°C).
How long does aluminum siding paint last?
The lifespan varies greatly depending on the paint type, quality of preparation, and weather conditions. High-quality paints can last 5-10 years or more, while cheaper options may only last a few years.
Do I need to prime aluminum siding before painting?
While not always strictly necessary, a primer specifically designed for aluminum and metal surfaces is highly recommended. It enhances adhesion and improves the paint’s overall performance.
What’s the best way to clean aluminum siding before painting?
A thorough cleaning with a pressure washer (low pressure setting) followed by a scrub with a mild detergent solution is best. Rinse thoroughly and allow to dry completely before painting.
Can I use a regular house paint on aluminum siding?
No, standard house paint isn’t formulated for the unique properties of aluminum siding and may not adhere properly, leading to peeling and chipping.
Comments are closed.