Installing Corrugated Siding A DIY Guide
Installing corrugated siding is a rewarding DIY project that can dramatically upgrade your home’s exterior. This guide walks you through every step, from choosing the right materials to mastering the finishing touches. We’ll cover various siding types, necessary tools, preparation techniques, the installation process itself, and essential maintenance tips. Get ready to transform your home’s curb appeal with a durable and stylish corrugated siding installation!
Whether you’re a seasoned DIYer or a weekend warrior tackling your first home improvement project, this comprehensive guide provides clear instructions and helpful tips to ensure a successful installation. We’ll break down complex tasks into manageable steps, making the entire process less daunting and more enjoyable. So, let’s get started on your corrugated siding journey!
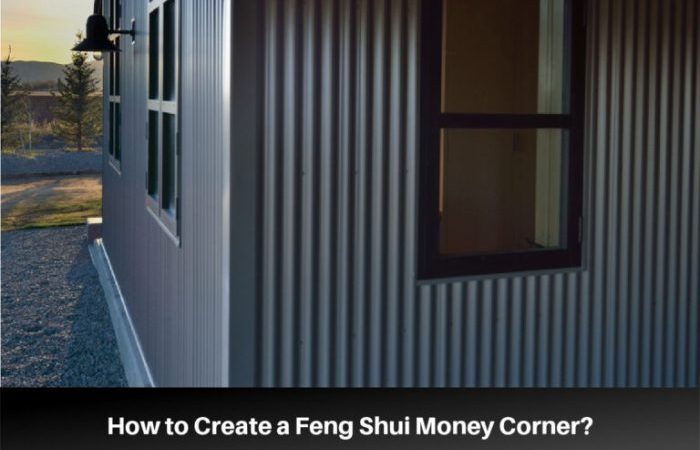
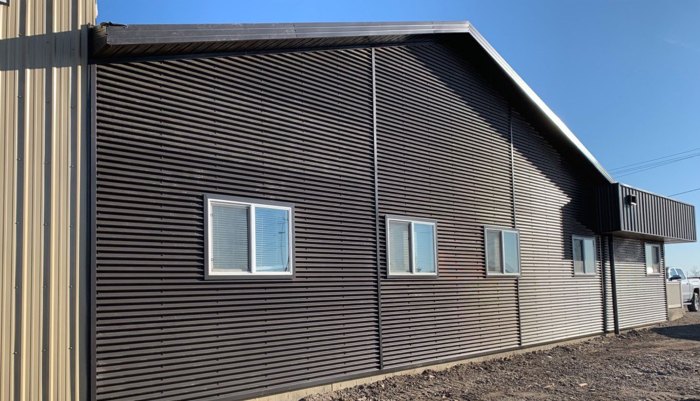
Types of Corrugated Siding

Source: homedit.com
Choosing the right corrugated siding depends on your budget, desired aesthetic, and the climate where you live. Different materials offer varying levels of durability, maintenance needs, and lifespan. Let’s explore the most common types.
Steel Corrugated Siding
Steel siding is a popular choice due to its strength and durability. It’s resistant to damage from impact, wind, and fire, making it a good option in areas prone to harsh weather. Steel siding is also relatively low-maintenance, requiring only occasional cleaning. However, it can be susceptible to rust and dents, and its appearance can be affected by scratches. The lifespan of steel siding is generally quite long, often exceeding 50 years with proper maintenance. Different coatings, such as zinc or polymer, are available to enhance its rust resistance and color retention.
Aluminum Corrugated Siding
Aluminum siding is lighter than steel, making it easier to handle and install. It’s also highly resistant to corrosion, which makes it an excellent choice for coastal areas or regions with high humidity. Aluminum is less prone to dents than steel, but it can be dented more easily by significant impacts. While it is recyclable, it is also not as strong as steel, and can be easily damaged by hail or other impacts. Aluminum siding typically lasts for 30-50 years.
Vinyl Corrugated Siding
Vinyl siding is a budget-friendly option that’s easy to install. It comes in a wide variety of colors and styles, offering significant aesthetic flexibility. It’s lightweight and requires minimal maintenance, usually just occasional cleaning. However, vinyl is not as durable as steel or aluminum; it can be easily damaged by impacts and extreme temperatures. Its lifespan is generally shorter, typically lasting 20-30 years. Exposure to UV rays can cause fading and discoloration over time.
Fiber Cement Corrugated Siding
Fiber cement siding combines the durability of cement with the workability of wood fibers. This results in a siding that’s extremely strong, fire-resistant, and resistant to insects and rot. It’s also a good choice for areas prone to extreme weather conditions. While more expensive than vinyl, it offers superior longevity and requires minimal maintenance. However, fiber cement siding is heavier than vinyl or aluminum, making installation more challenging. It is also prone to cracking if not installed correctly. A well-maintained fiber cement siding can last for 50 years or more.
Comparison Table
| Siding Type | Cost | Installation Difficulty | Aesthetic Appeal |
|---|---|---|---|
| Steel | Medium-High | Medium | Medium-High |
| Aluminum | Medium | Easy | Medium |
| Vinyl | Low | Easy | Medium-High |
| Fiber Cement | High | Medium-High | High |
Tools and Materials Needed

Source: hdnux.com
Getting the right tools and materials is crucial for a successful corrugated siding installation. Having everything prepared beforehand saves time and frustration, ensuring a smooth and efficient process. This section details the necessary equipment and materials, categorized for clarity.
Measuring and Marking Tools
Accurate measurements are essential for a neat and professional-looking finish. Improper measurements can lead to wasted materials and unsightly gaps. You’ll need tools to precisely measure and mark the siding panels for cutting and placement.
- Measuring tape: A long, durable tape measure (at least 25 feet) is vital for accurate measurements of walls and panels.
- Chalk line: Used to create straight lines on the wall for consistent siding placement.
- Level: A level, preferably a 4-foot level, is needed to ensure the siding is installed perfectly plumb and level.
- Speed square: Useful for marking precise 90-degree angles, especially when cutting panels.
Cutting Tools
Cutting corrugated siding requires specialized tools to avoid damaging the material and ensure clean cuts. Using the wrong tool can result in jagged edges and compromised structural integrity.
- Circular saw with a fine-tooth metal-cutting blade: This is the most common and efficient method for cutting corrugated metal siding. A fine-tooth blade minimizes the risk of tearing or damaging the metal.
- Tin snips: Useful for making smaller cuts or intricate shapes, particularly in tight spaces where a circular saw is impractical.
- Safety glasses and hearing protection: Always wear appropriate safety gear when using power tools.
Fastening Tools, Installing corrugated siding
The right fasteners are essential for securing the siding panels firmly and preventing them from being damaged by wind or other external forces. The type of fastener should be chosen based on the siding material and the local climate.
- Drill with appropriate drill bits: A cordless drill is ideal for quickly and efficiently driving screws.
- Impact driver: An impact driver offers greater torque and is particularly useful when driving screws into harder materials.
Fasteners
Choosing the right fasteners is critical for a long-lasting and weatherproof installation. Different materials require different fasteners.
- Self-tapping screws: These are commonly used for corrugated metal siding. They are designed to create their threads as they are driven into the material. Stainless steel screws are preferred for their corrosion resistance.
- Sheet metal screws: These screws are specifically designed for use with sheet metal and provide excellent holding power. They often have a sharp point for easy penetration.
- Rivets: In some cases, rivets might be used for fastening, especially in applications requiring extra strength and resistance to vibration. However, screws are generally preferred for their ease of installation.
The advantages of stainless steel fasteners are their corrosion resistance, extending the lifespan of the siding. However, they can be more expensive than other options. Galvanized steel fasteners offer a good balance of cost and durability, but they may be susceptible to corrosion over time, especially in harsh coastal environments.
Materials Checklist (Sample Project: 100 sq ft)
This checklist provides estimated quantities for a 100 sq ft project. Adjust quantities based on your specific needs and project size.
- Corrugated siding panels: Calculate the required number of panels based on the area to be covered and panel dimensions. (e.g., approximately 10-12 panels for a 100 sq ft area).
- Fasteners (screws): Allow for extra fasteners in case of mistakes or damage. (e.g., 200-300 screws).
- Flashing: Use flashing to prevent water penetration around windows, doors, and other openings. (e.g., 10-20 linear feet).
- J-channel: Used to finish the edges of the siding. (e.g., 20-30 linear feet).
- Caulk: Use caulk to seal gaps and ensure a watertight installation. (e.g., 1-2 tubes).
- Safety equipment: Safety glasses, gloves, and hearing protection are essential.
Preparation and Planning

Source: rpsmetalroofing.com
Getting your wall ready for corrugated siding is crucial for a long-lasting, attractive finish. Proper preparation ensures the siding adheres correctly and protects your home from the elements. This involves cleaning the surface, repairing any damage, and making sure you have the right measurements and understand the importance of ventilation and moisture barriers.
Preparing the wall surface is the first step towards a successful installation. This involves more than just a quick sweep. You need to create a clean, even surface for the siding to attach to.
Wall Surface Preparation
Thoroughly clean the wall to remove any dirt, loose paint, cobwebs, or debris. A pressure washer is ideal for this task, but a stiff brush and soapy water will also work. Pay close attention to any areas with mold or mildew; these need to be treated with a suitable cleaning solution and allowed to dry completely before proceeding. After cleaning, carefully inspect the wall for any damaged areas such as cracks, holes, or rotting wood. Repair these using appropriate patching materials like wood filler or cement, ensuring a smooth, even surface once dry. For larger repairs, consider replacing damaged sections of sheathing. Remember, a properly prepared surface is the foundation for a successful siding installation.
Measuring and Marking the Wall
Accurate measurements are vital to avoid wasted materials and ensure a professional-looking finish. Begin by measuring the total height and width of the wall area you’ll be siding. Then, determine the number of siding sheets needed, accounting for overlaps. Remember to add extra material for cuts and potential mistakes. A common mistake is failing to account for the overlap required between each sheet of corrugated siding. Typically, you’ll need an overlap of at least 6 inches, depending on the manufacturer’s instructions. Another frequent error is neglecting to factor in the vertical alignment of the sheets, leading to uneven spacing and an unprofessional appearance. Always double-check your measurements before cutting any siding. Mark the wall using a chalk line or pencil to guide the installation process, ensuring straight vertical and horizontal lines. Use a level to verify the accuracy of your markings. Consider snapping chalk lines to help keep the sheets aligned.
Ventilation and Moisture Barriers
Proper ventilation and moisture barriers are essential to prevent moisture buildup behind the siding, which can lead to rot, mold, and other damage. A moisture barrier, such as a polyethylene sheeting or house wrap, should be installed over the wall sheathing before the siding. This prevents water from penetrating the wall cavity. This barrier should be overlapped and sealed to prevent water from entering. Adequate ventilation is also critical to allow air to circulate behind the siding, removing any trapped moisture. Ventilation can be achieved through vents at the bottom and top of the wall, or by using vented soffits and fascias. This helps to equalize pressure and prevent moisture buildup. Remember to consult local building codes for specific requirements regarding ventilation. Ignoring these aspects can significantly reduce the lifespan of your siding and the structural integrity of your home. Think of it like this: your siding is the raincoat, but the moisture barrier and ventilation are the waterproof lining and breathability that keeps everything dry and prevents mildew.
Installation Process
Source: formasteel.ca
Installing corrugated siding is a straightforward process, but careful planning and attention to detail are key to a professional-looking and weathertight finish. This section Artikels the steps involved, from the first panel to the last. Remember to always consult the manufacturer’s instructions for your specific siding material.
The installation process generally begins at a corner and proceeds horizontally, working from bottom to top. Proper overlapping and securing of each panel are critical to prevent water penetration and maintain structural integrity. Cutting panels to fit around corners, windows, and doors requires precision and the right tools.
Starting the First Panel
Begin installation at a corner of the building, ensuring the bottom edge of the first panel is level and aligned with your foundation or desired starting point. Secure the panel using appropriate fasteners, spacing them according to the manufacturer’s recommendations. Typically, fasteners are driven through the corrugations and into the underlying structure. Overdriving fasteners can damage the siding. Ensure the panel is plumb and straight before moving to the next one.
Overlapping and Securing Panels
Each subsequent panel should overlap the previous one by the recommended amount, usually specified by the manufacturer (typically 6 inches). This overlap provides weather protection. Fasteners should be placed in the upper portion of the overlapping panel to conceal them and prevent water penetration. Maintain consistent overlap throughout the installation. The overlapping edge should be firmly pressed against the previously installed panel.
Cutting Panels
Cutting corrugated siding is best accomplished with a sharp metal-cutting blade or a circular saw with a fine-tooth metal-cutting blade. Measure carefully before cutting to avoid wasting material. For corners, you will typically need to cut the panels at a 45-degree angle to create a neat mitered joint. Use a speed square or protractor to ensure accurate angles. For obstacles like windows and doors, measure and mark the cut lines precisely, ensuring a snug fit. Remember to account for the overlap when measuring.
Installing Trim and Flashing Around Windows and Doors
Before installing siding around windows and doors, install flashing to prevent water from seeping behind the siding. Flashing is typically a metal sheet that is installed under the siding and overlaps the window or door frame. Trim pieces are then installed to cover the edges of the siding and provide a finished look. These trim pieces are usually specifically designed for corrugated siding and are available in various styles to match your siding. Secure both the flashing and trim with appropriate fasteners. Ensure all joints are sealed with a high-quality sealant to prevent water intrusion.
Finishing Touches and Maintenance: Installing Corrugated Siding
After the satisfying click of your last panel, the installation isn’t quite finished. Proper sealing and ongoing maintenance are crucial for ensuring your corrugated siding looks great and protects your home for years to come. Neglecting these steps can lead to costly repairs down the line.
Caulking and Sealing Gaps and Seams
Water infiltration is the enemy of any exterior cladding. Even the smallest gaps or cracks can allow moisture to penetrate, leading to rot, mold, and structural damage. Therefore, meticulously sealing all seams and gaps is a vital final step. Use a high-quality, exterior-grade caulk specifically designed for use with metal siding. Choose a color that closely matches your siding to minimize its visual impact. Apply the caulk in a smooth, continuous bead, ensuring complete coverage of any gaps around windows, doors, and where siding panels meet. Pay close attention to areas where the siding intersects with other building materials, such as trim or flashing. Allow the caulk to fully cure before exposing it to rain or extreme temperatures. For particularly vulnerable areas, consider using backer rod to fill larger gaps before applying caulk, ensuring a more durable and effective seal.
Cleaning and Maintaining Corrugated Siding
Regular cleaning is key to maintaining the appearance and longevity of your corrugated siding. The frequency and method will depend on your climate and the type of siding material. For instance, in areas with heavy pollution or frequent storms, more frequent cleaning might be necessary. Generally, a simple pressure washing once or twice a year is sufficient. Always use a low-pressure setting to avoid damaging the siding’s finish. For stubborn stains or mildew, you can use a mild detergent solution, but always test it on a small, inconspicuous area first to ensure it doesn’t damage the siding. Avoid abrasive cleaners or scrubbing brushes that could scratch the surface. After cleaning, rinse thoroughly with clean water.
Maintenance Schedule
A proactive maintenance schedule will significantly extend the life of your corrugated siding. The following table, Articles recommended tasks and frequencies, remembering that these are guidelines and may need adjustment based on your specific climate and siding material:
| Task | Frequency | Notes |
|---|---|---|
| Visual Inspection for Damage | Annually (Spring/Fall) | Check for loose panels, rust, dents, or signs of water damage. |
| Cleaning (Pressure Washing) | Twice Yearly (Spring/Fall) | Use low-pressure setting; avoid harsh chemicals. |
| Caulk Inspection and Repair | Annually | Check for cracks or gaps in caulking and re-caulk as needed. |
| Rust Treatment (if applicable) | As needed | Address any rust spots promptly with a rust converter or paint. |
| Paint Touch-ups (if applicable) | As needed | Touch up any chipped or faded paint to maintain appearance. |
Troubleshooting Common Issues
Installing corrugated siding can present some challenges, but most problems are easily solved with a little know-how. Understanding common issues and their solutions will help you achieve a professional-looking and long-lasting finish. This section covers some of the most frequent problems encountered and provides practical solutions for correcting them.
Misaligned Panels
Misaligned panels are a common eyesore. They often result from improper measurement, rushed installation, or neglecting to account for expansion and contraction. Accurate measuring and careful panel placement are key to avoiding this. If you notice misalignment during installation, immediately correct it before moving to the next panel. Significant misalignment may require removing and reinstalling affected sections. Remember to always double-check your measurements and use a level to ensure each panel is perfectly straight before securing it. If the misalignment is minor, you might be able to gently adjust the panel with a pry bar, being careful not to damage the siding or underlying structure.
Fastener Issues
Using the wrong fasteners or improper installation techniques can lead to problems. For example, using fasteners that are too short might not adequately secure the siding, leading to loose panels or even damage during high winds. Conversely, using fasteners that are too long can penetrate the underlying structure, creating leaks or compromising the integrity of the wall. Always use the manufacturer’s recommended fasteners and follow their guidelines for spacing and penetration depth. If you find loose fasteners, tighten them or replace them as needed. If fasteners have penetrated too deeply, consider using sealant to prevent leaks.
Water Damage
Water damage is a serious issue that can lead to rot, mold, and structural damage. This often stems from improper installation, such as gaps between panels, inadequate flashing around windows and doors, or failing to properly seal joints and seams. Preventative measures are crucial. Ensure all seams and joints are properly sealed with appropriate sealant. Use flashing to divert water away from vulnerable areas. Regularly inspect your siding for any signs of water damage and address them promptly. If you discover water damage, repair it immediately to prevent further problems. This might involve replacing damaged sections of siding and addressing any underlying structural issues.
Dents and Scratches
Dents and scratches are common, especially during installation or from accidental impacts after installation. While some minor scratches might be barely noticeable, deep dents are more problematic. For minor scratches, you may be able to use a touch-up paint to blend them in. For more significant dents, replacement of the affected panel might be necessary, depending on the severity and the location of the damage. Always handle the siding carefully during installation to minimize the risk of damage.
Fading
Fading is a natural process that occurs over time due to sun exposure. The rate of fading depends on the type of siding and the intensity of sunlight. While you can’t completely prevent fading, you can slow it down by choosing a higher-quality, UV-resistant siding. Regular cleaning can also help to maintain the siding’s appearance. If the fading is excessive and unsightly, you may consider repainting or replacing the siding.
Safety Precautions
Installing corrugated siding involves working at heights and using power tools, both of which present significant safety risks. Following proper safety procedures is crucial to prevent accidents and injuries. This section includes essential safety measures to ensure a safe and successful installation.
Safety should be your top priority throughout the entire project. Failing to take appropriate precautions can lead to serious injury or even death. Always remember that a moment of carelessness can have lasting consequences.
Personal Protective Equipment (PPE)
Appropriate personal protective equipment (PPE) is non-negotiable when working with corrugated siding. This equipment acts as a crucial barrier between you and potential hazards. Consistent use of PPE minimizes the risk of injuries from falling debris, sharp edges, and power tool mishaps.
- Safety Glasses or Goggles: Protect your eyes from flying debris, dust, and chemical splashes.
- Hearing Protection: Power tools generate significant noise levels that can cause hearing damage over time. Earmuffs or earplugs are essential.
- Work Gloves: Protect your hands from cuts, splinters, and abrasions caused by sharp metal edges and rough materials.
- Dust Mask or Respirator: Protect your lungs from inhaling dust and particles generated during cutting and sanding.
- Hard Hat: Essential when working at heights to protect your head from falling objects.
- Safety Harness and Fall Protection System: Mandatory when working at significant heights, ensuring a secure working environment.
- Steel-Toed Boots: Protect your feet from dropped objects and potential crushing hazards.
Working at Heights
Working at heights significantly increases the risk of falls, a leading cause of serious injuries on construction sites. Proper planning and the use of appropriate safety equipment are paramount.
- Secure Scaffolding or Ladder: Ensure your scaffolding or ladder is properly set up, stable, and capable of supporting your weight and the weight of your tools.
- Three-Point Contact: Maintain three points of contact with the ladder at all times (two hands and one foot, or two feet and one hand).
- Fall Protection: Utilize a safety harness and anchor point to prevent falls from significant heights. Never work at heights without appropriate fall protection.
- Assess the Work Area: Before starting work, carefully inspect the area for any potential hazards, such as loose materials or uneven surfaces.
Power Tool Safety
Power tools are essential for efficient corrugated siding installation, but they also present significant safety risks if not used correctly. Always follow manufacturer’s instructions and prioritize safe operating procedures.
- Proper Tool Maintenance: Keep your tools in good working order, regularly checking for damage and ensuring sharp blades. Dull blades increase the risk of slips and accidents.
- Secure Grip: Maintain a firm grip on the tool at all times, preventing accidental drops or slips.
- Use Appropriate Guards: Ensure all safety guards are in place and functioning correctly before operating any power tool.
- Disconnect Power: Always disconnect the power cord before making adjustments or cleaning the tool.
- Avoid Force: Do not force the tool; if it’s binding or struggling, stop and investigate the cause.
Waste Disposal
Proper disposal of waste materials is crucial for environmental protection and worker safety. Different materials require different disposal methods.
- Scrap Metal: Recycle scrap metal at a designated recycling center.
- Wood Scraps: Dispose of wood scraps according to local regulations; some areas may allow for yard waste disposal, while others may require separate disposal.
- Packaging Materials: Dispose of packaging materials like cardboard and plastic according to local recycling guidelines.
- Hazardous Waste: Dispose of any hazardous waste, such as paint or solvents, according to local regulations and at designated hazardous waste disposal sites.
Last Recap
Transforming your home’s exterior with corrugated siding is a project that offers both aesthetic and practical benefits. By following this guide, you’ve equipped yourself with the knowledge and confidence to tackle this project successfully. Remember, careful planning, attention to detail, and adherence to safety precautions are key to a flawless installation. Enjoy your newly sided home – a testament to your hard work and DIY prowess!
Commonly Asked Questions
Can I install corrugated siding over existing siding?
Sometimes, but it depends on the condition of the existing siding and the type of new siding you’re installing. Inspect for rot or damage; if found, repair or remove the old siding before installation. Check building codes for your area regarding layering siding.
How much does corrugated siding cost?
Costs vary greatly depending on the material (steel, aluminum, vinyl), size, and style. Get multiple quotes from suppliers for accurate pricing in your area.
How long does corrugated siding last?
Lifespan depends on the material; steel and aluminum can last 30-50 years or more with proper maintenance, while vinyl may last 20-30 years.
What’s the best way to clean corrugated siding?
Regularly rinse with a garden hose to remove dirt and debris. For tougher stains, use a mild detergent solution and a soft brush. Avoid harsh chemicals.
Do I need a permit to install corrugated siding?
Check with your local building department; permits are often required for exterior renovations of this magnitude.
Comments are closed.